
How To Make The Best Cinnamon Roll Recipe
This post may contain affiliate links. We participate in the Amazon Services LLC Associates Program, an affiliate advertising program designed to provide a means for us to earn fees by linking to Amazon.com and affiliated sites at no extra cost to you.
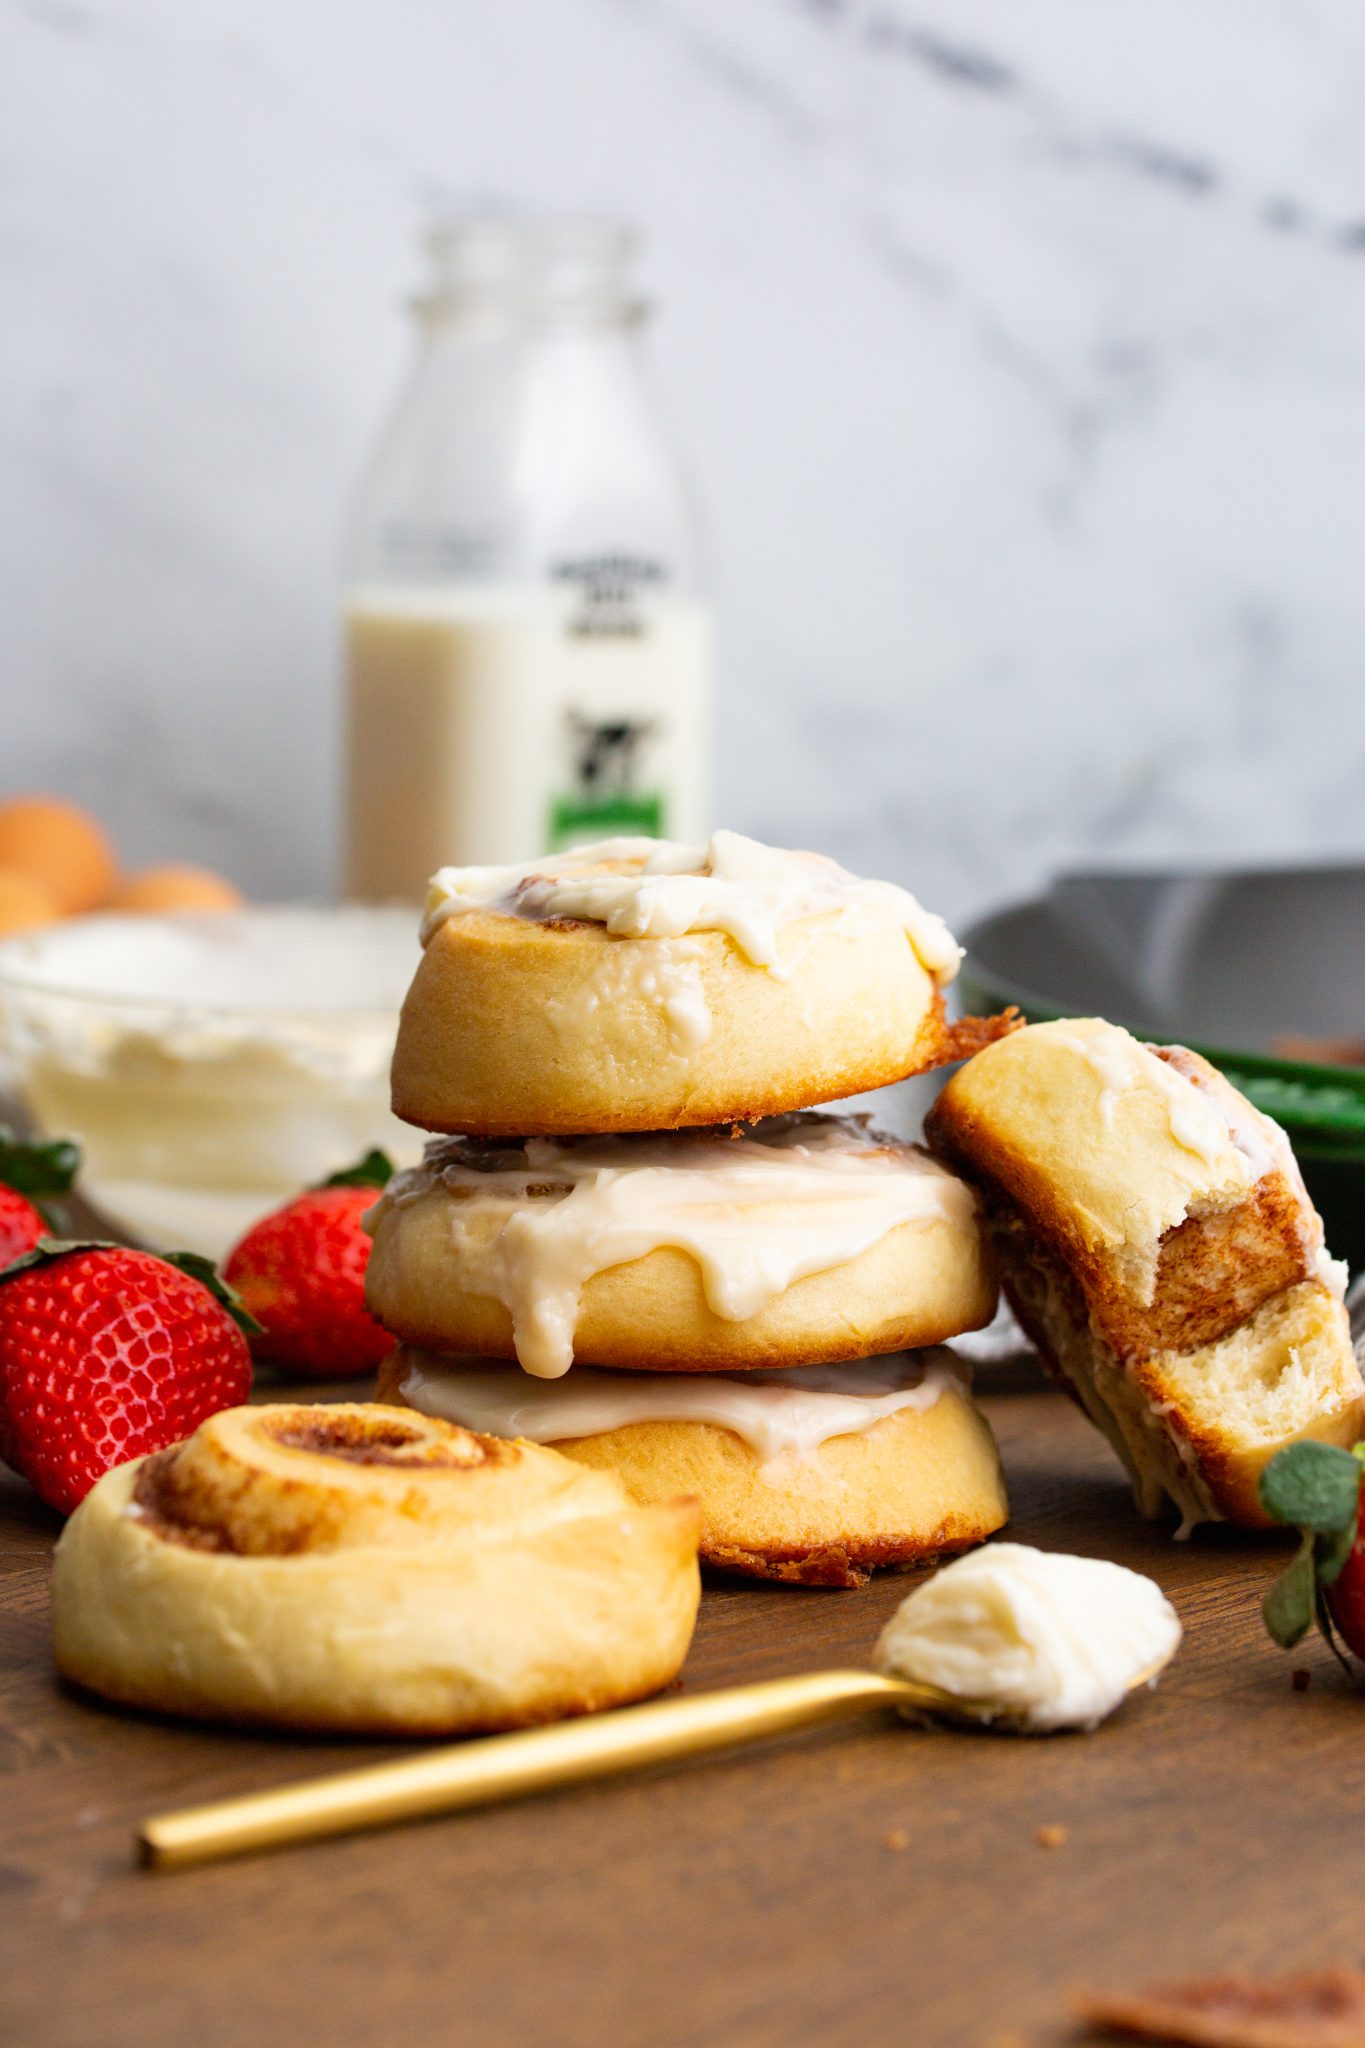
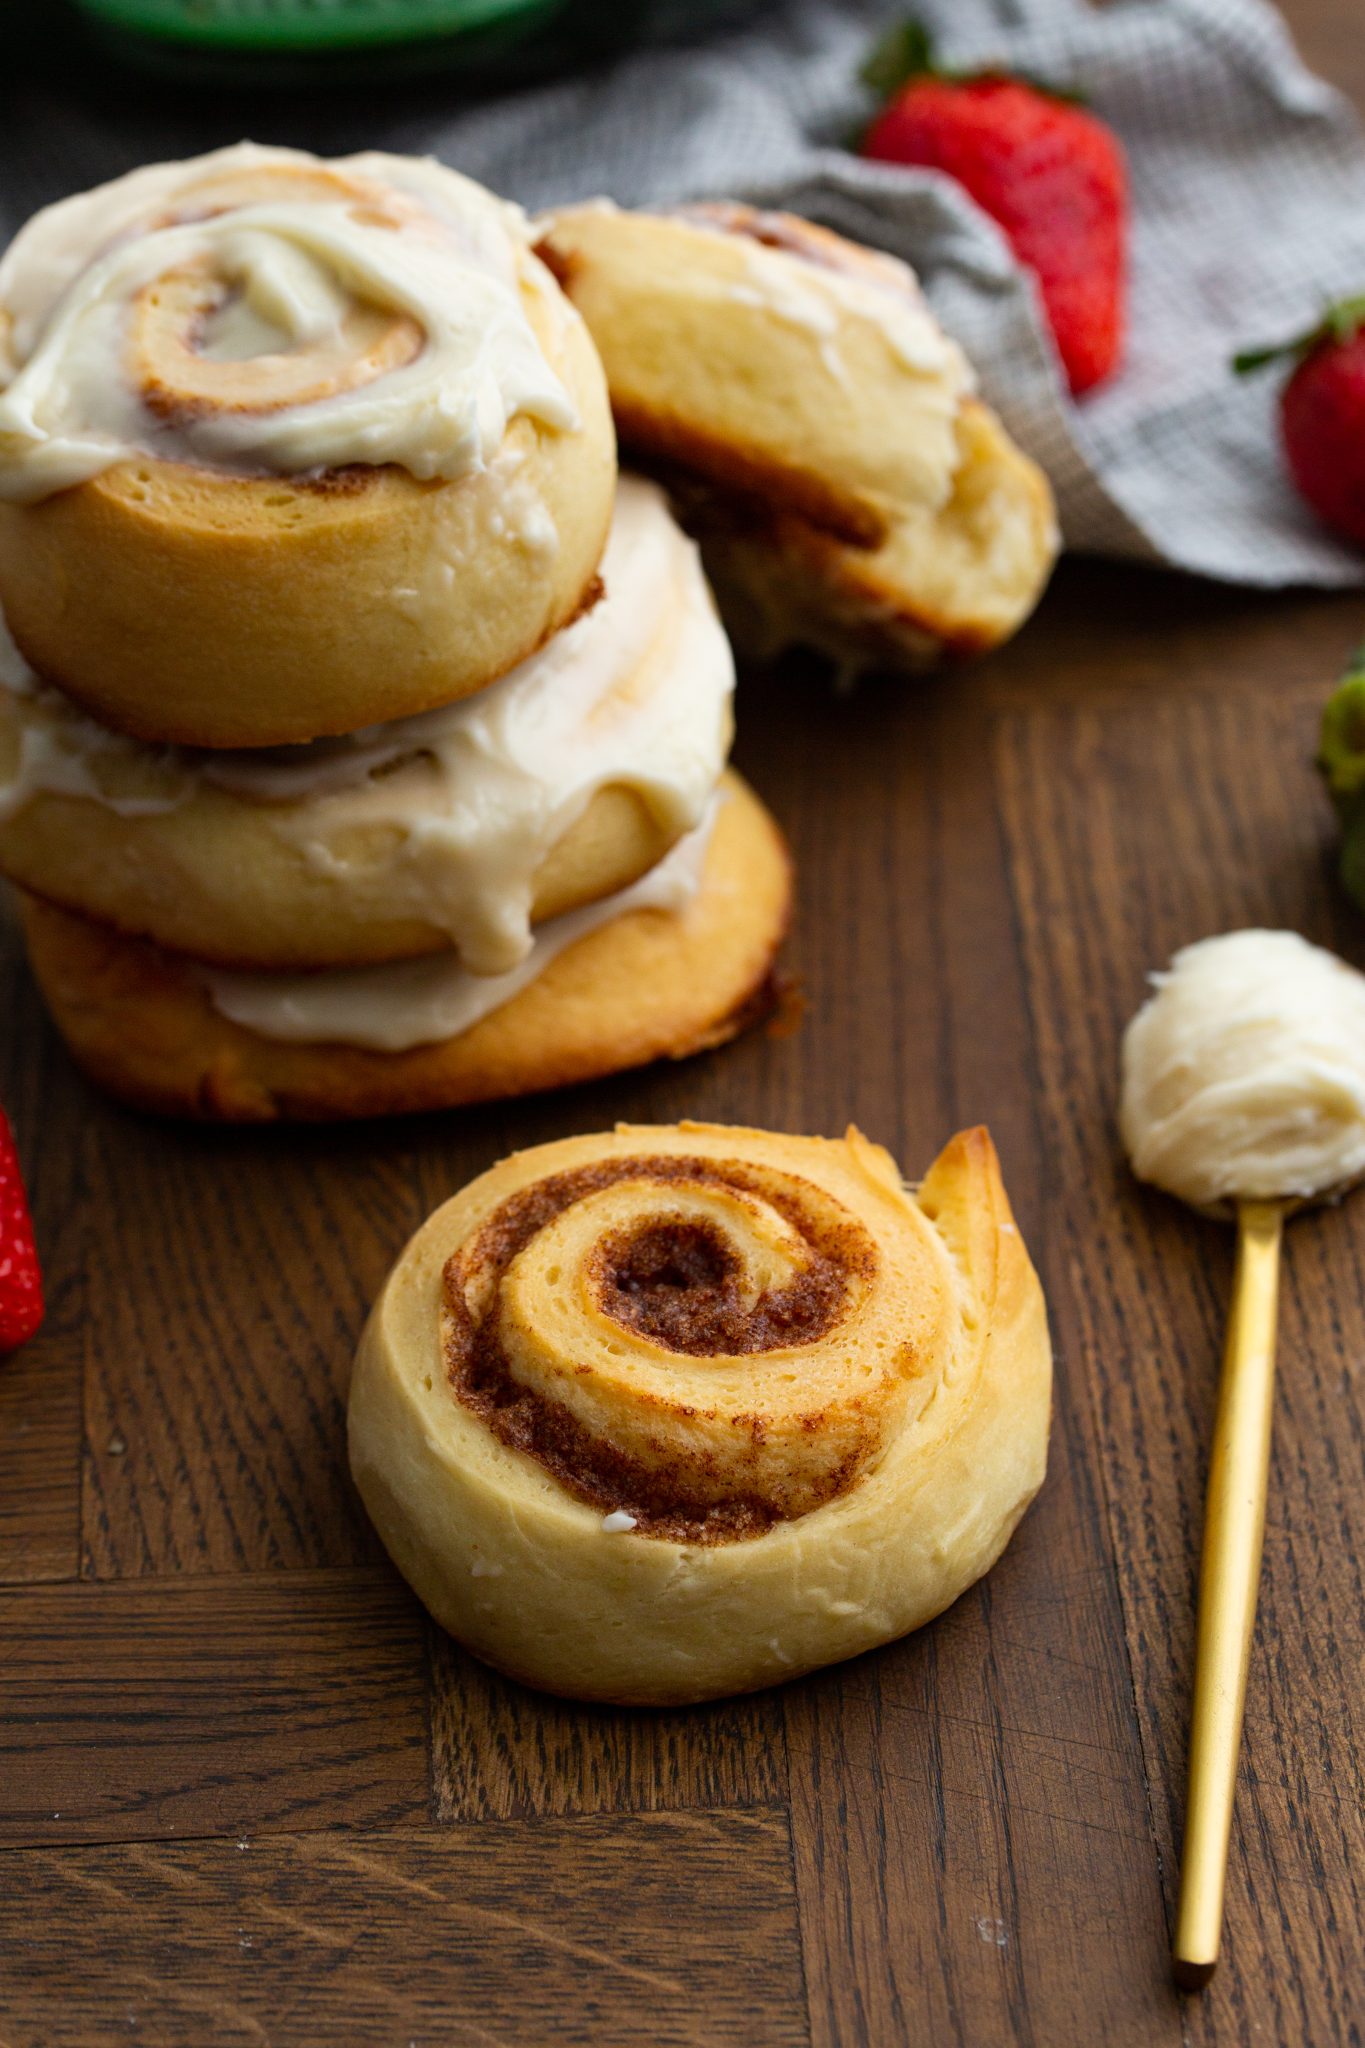
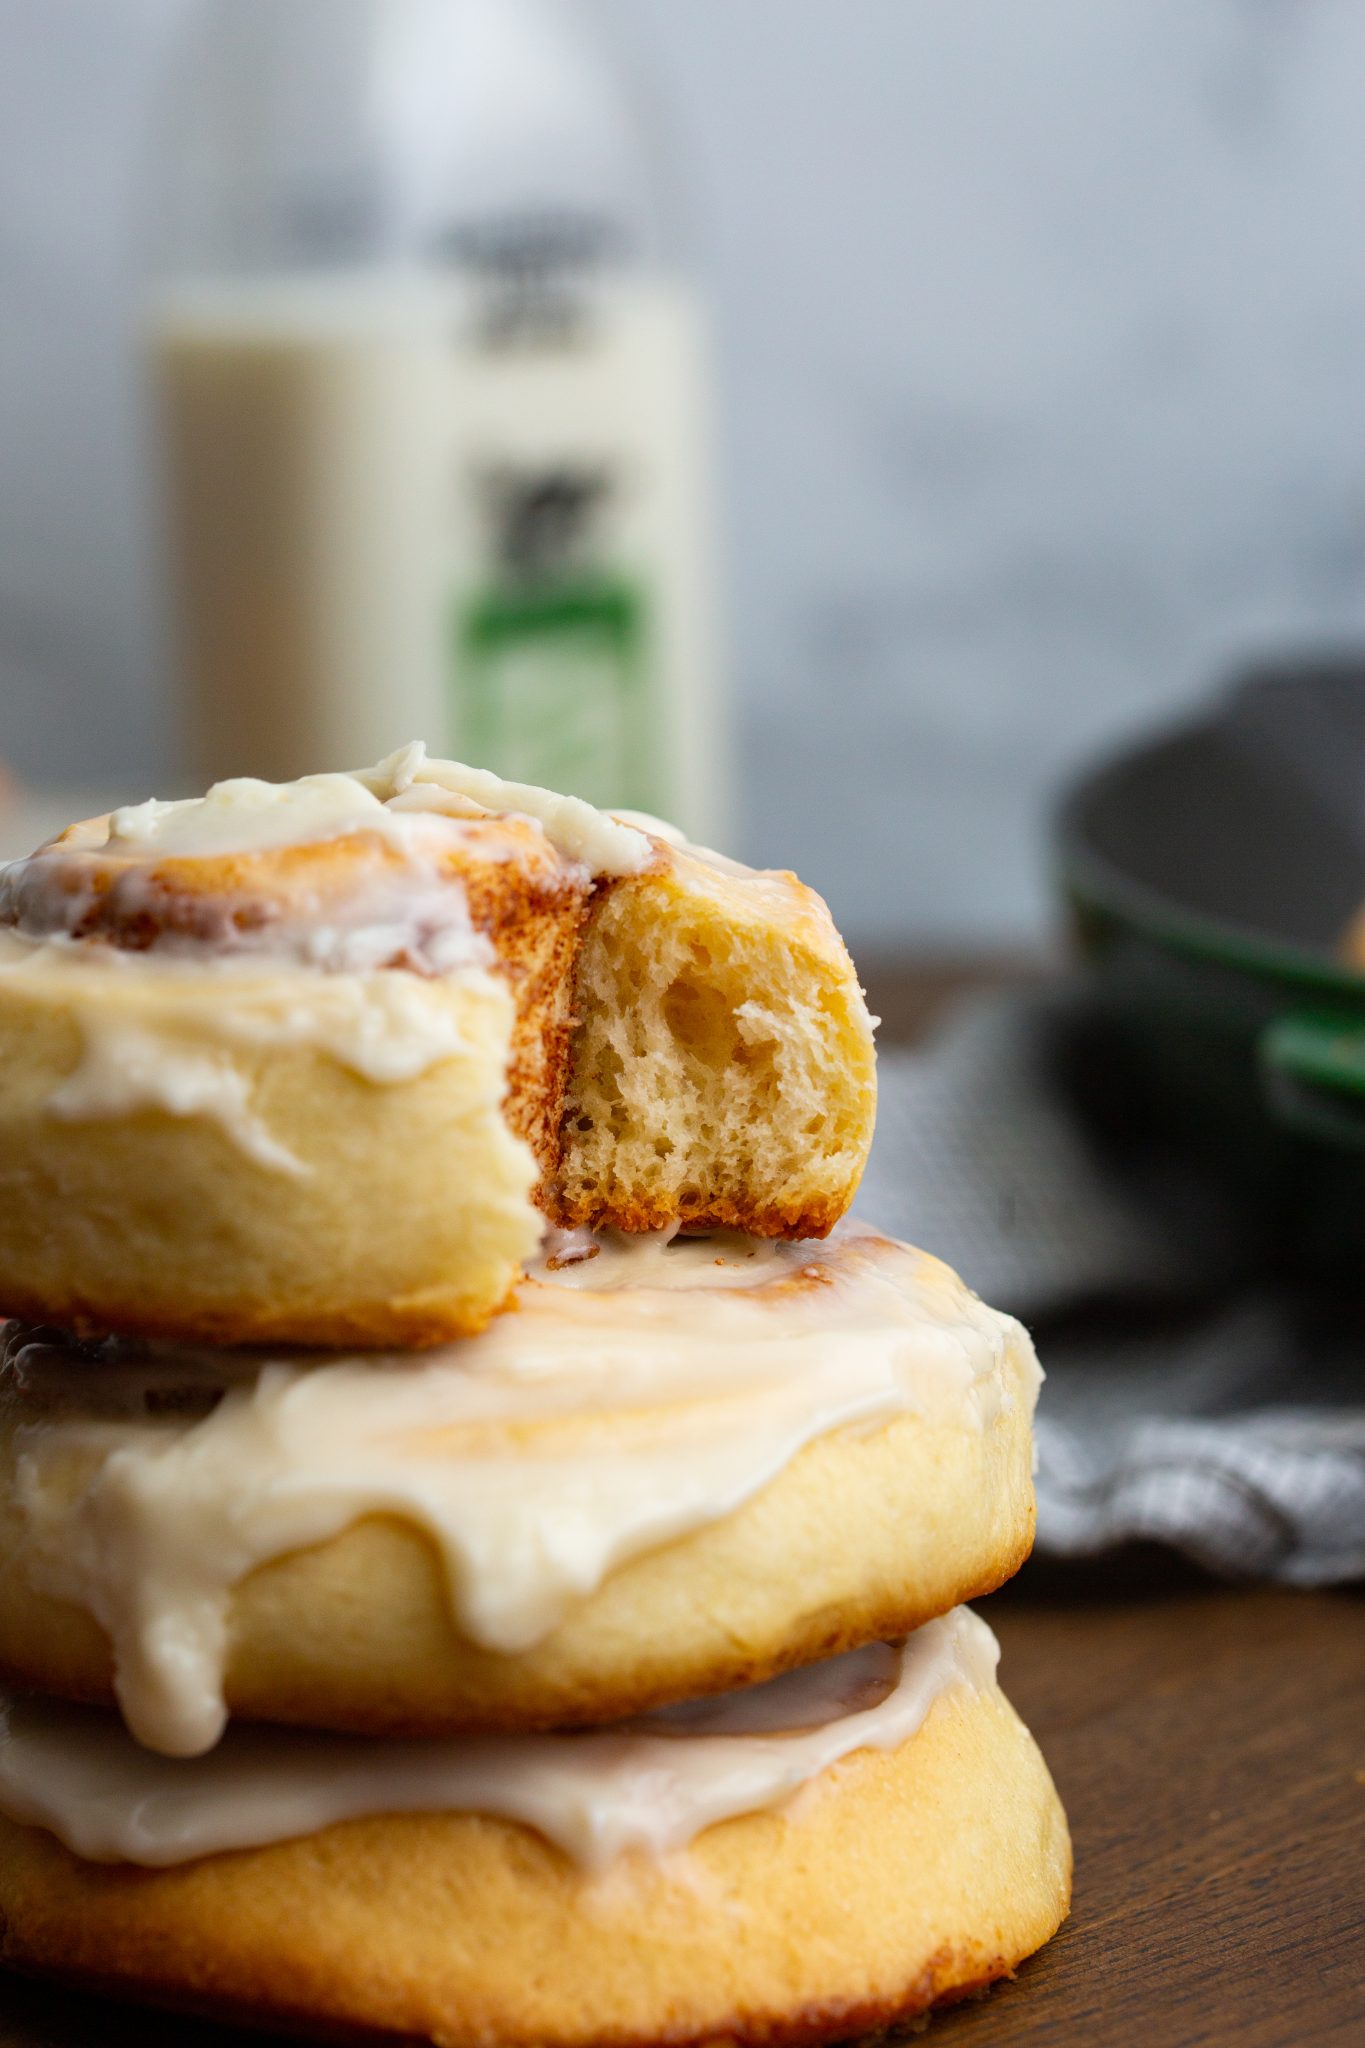
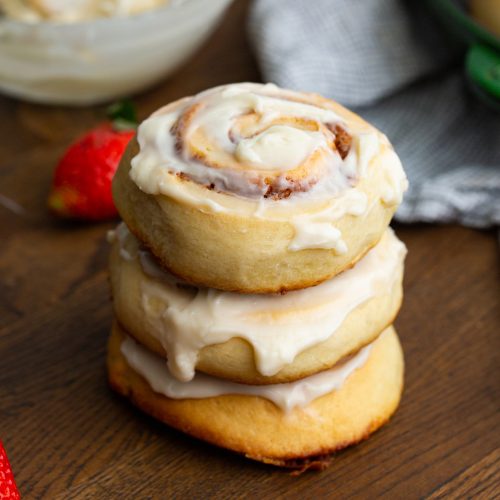
Soft and tender classic Cinnamon Rolls are exactly what you need during the holiday season, or any weekend morning for that matter! Filled with cinnamon brown sugar and topped with a cream cheese frosting or flat icing, the love can be tasted in every pillowy bite. Watch the video for an in-depth tutorial on making the best cinnamon roll recipe this pastry Chef has to offer!
We are a participant in the Amazon Services LLC Associates Program, an affiliate advertising program designed to provide a means for us to earn fees by linking to Amazon.com and affiliated sites at no extra cost to you. We also participate in similar programs with RStyle and other companies.
How to Make Classic Cinnamon Rolls
Start by adding the yeast to warmed milk. Milk should be slightly warm to the touch. Not so hot that it burns your fingers, but warmer than room temperature. Too hot and you could kill the yeast. Give a little stir with a fork or small whisk and allow to sit for 5 minutes to ensure all the yeast has been coated with milk and is activated. Even if you use instant yeast, this will prevent clumps of yeast from appearing in your dough as you mix.
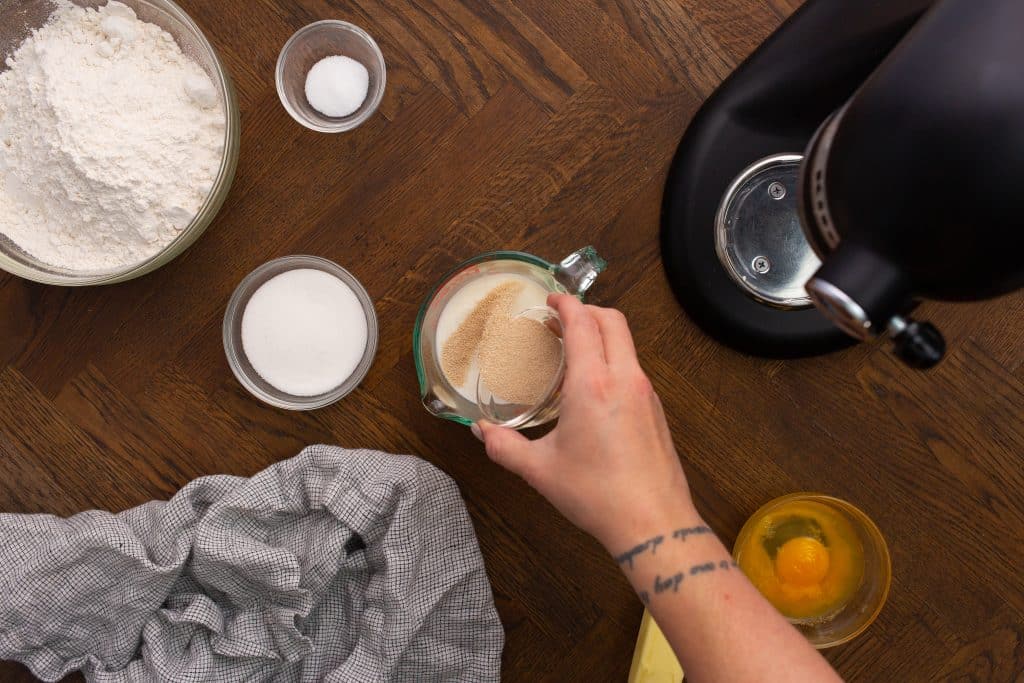
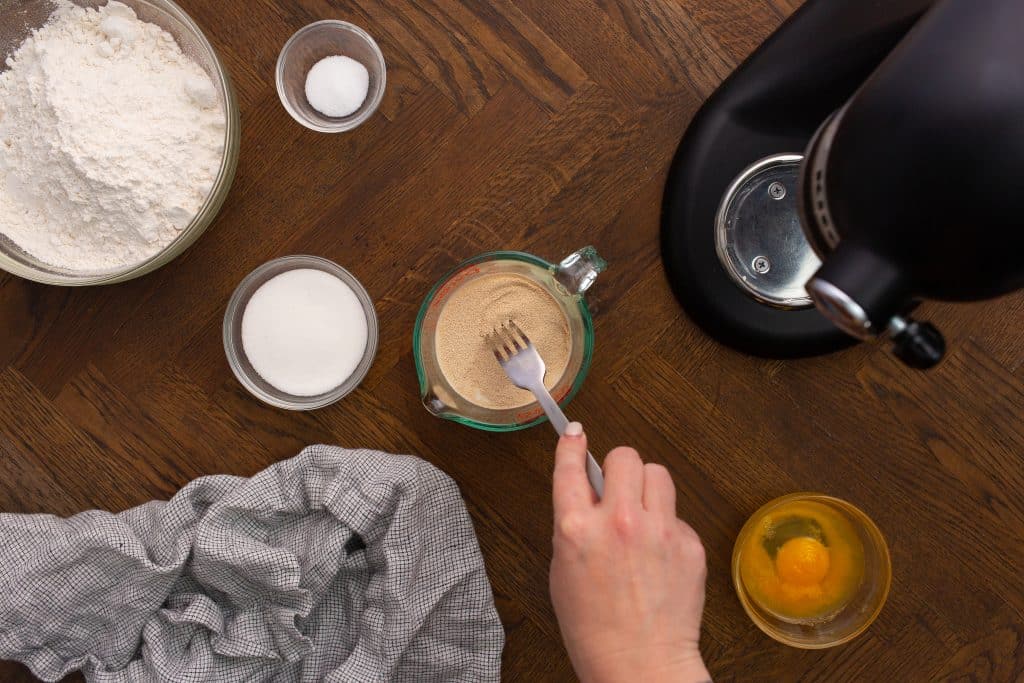
Add the yeast mixture to the bowl of a stand mixer. Then add the flour, sugar, salt, and eggs. Note that you never want to add salt to the top of any yeast mixture as it will prohibit growth.
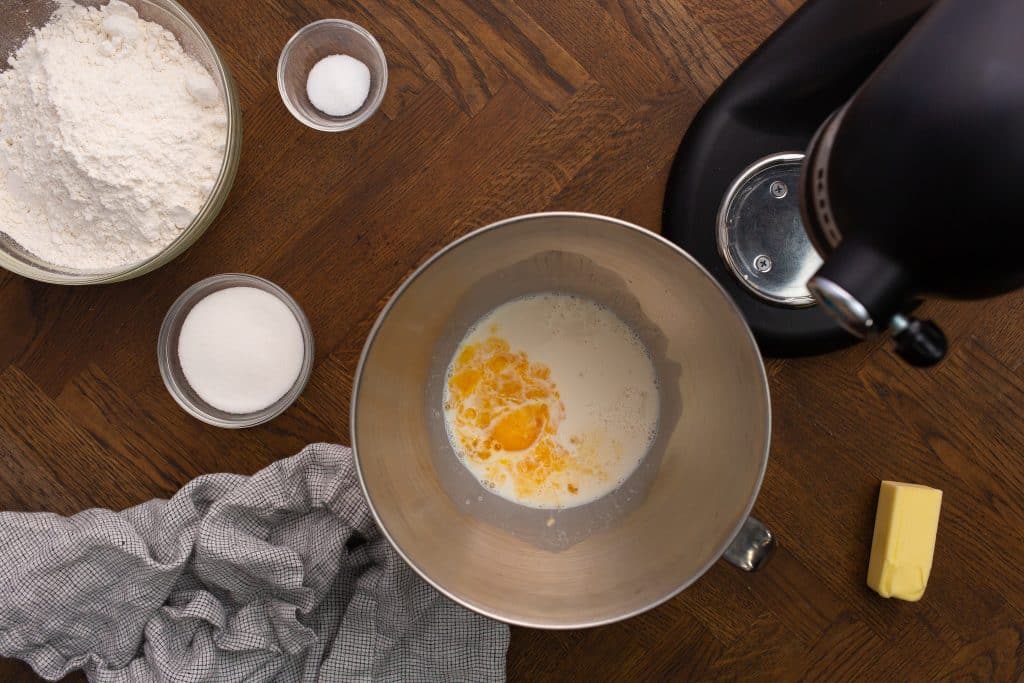
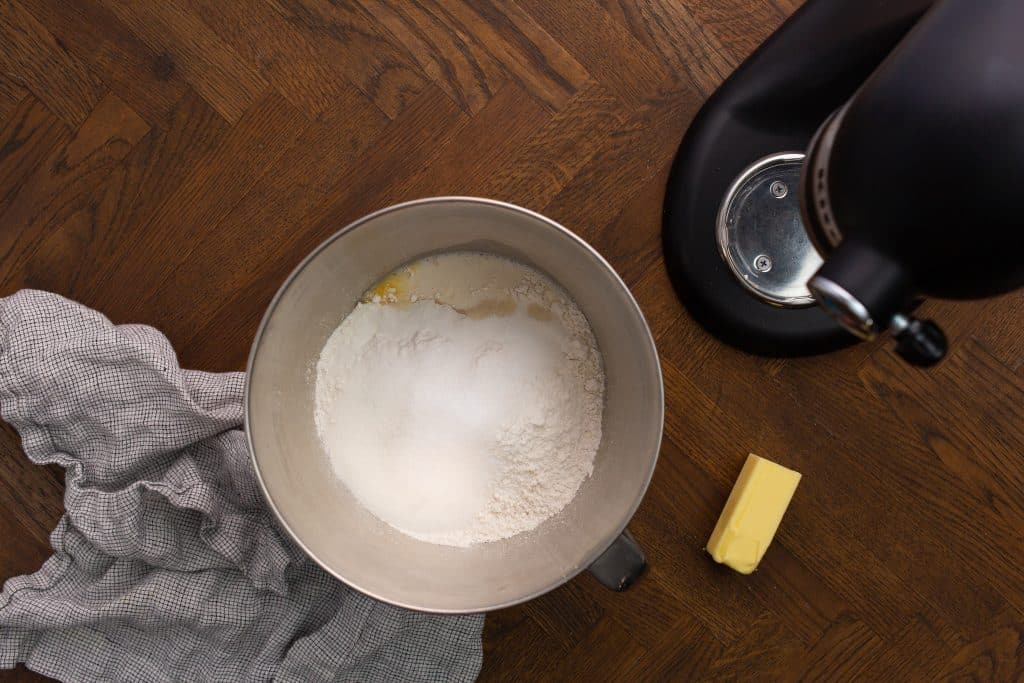
Fit the stand mixer with a dough hook and begin to mix on low speed until the dough starts to come together (about 2 minutes), this is called the pickup stage. During this stage of mixing the the loose ingredients are “picked up” to start forming the developing dough.
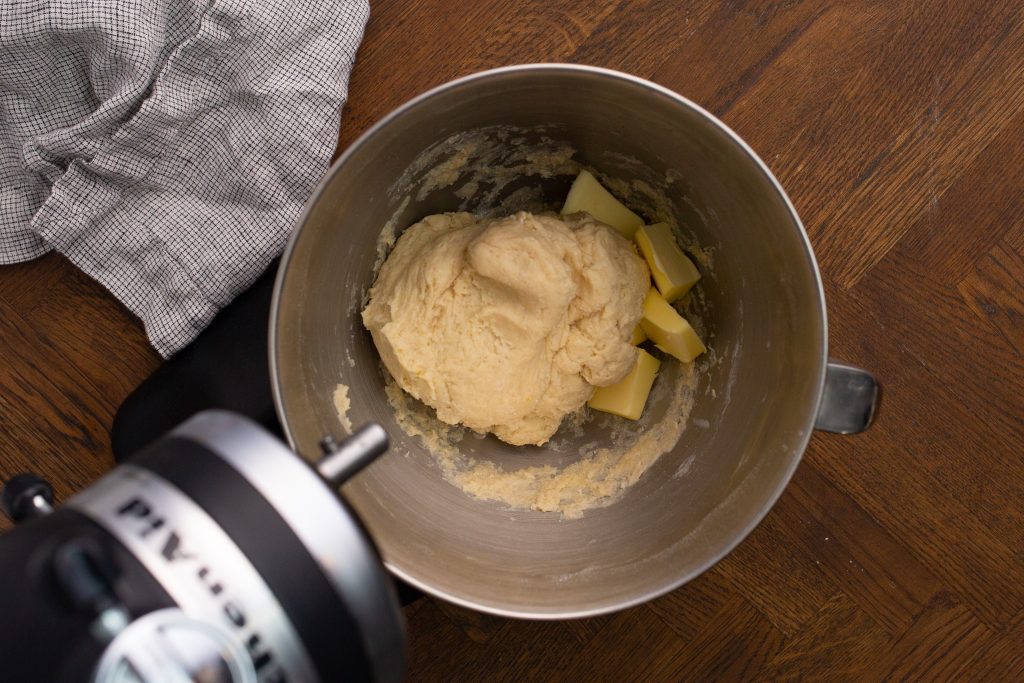

Next add the softened butter and continue to mix on low speed for about 2 minutes. This is called the cleanup stage of mixing. In this stage you’ll notice the dough “clean up” the bowl as it is mixed. The dough becomes fully hydrated during this stage and will result in a slightly sticky dough with a little butter left on the side.
After about 2 minutes, use a rubber spatula to scrape the bowl down and fold the butter into the dough on the bottom of the mixer. Continue to mix on low speed until the butter is fully incorporated, and then increase the speed to medium to develop more gluten. No ingredients should be left on the bowl at this point.
Mixing on medium to develop gluten should only take about 4 minutes. The dough should not feel sticky or wet, but look tender and like a cloud with a lobe sticking off of it as it mixes. To the touch is should feel slightly firm and smooth.
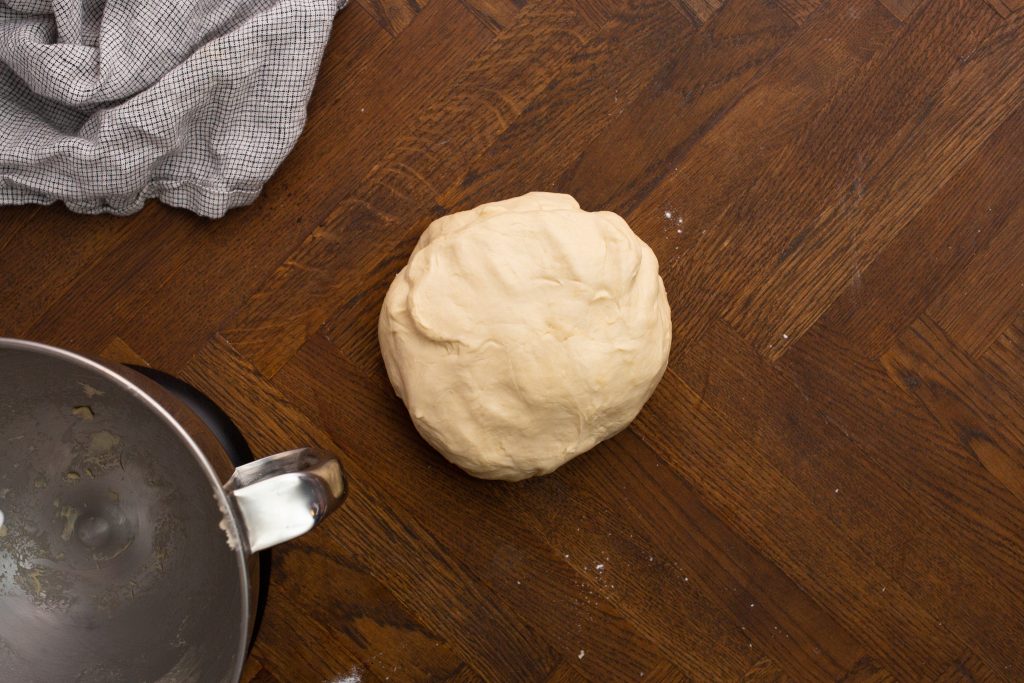
Gently knead the dough on a flourless countertop to bring together into a smooth round ball.
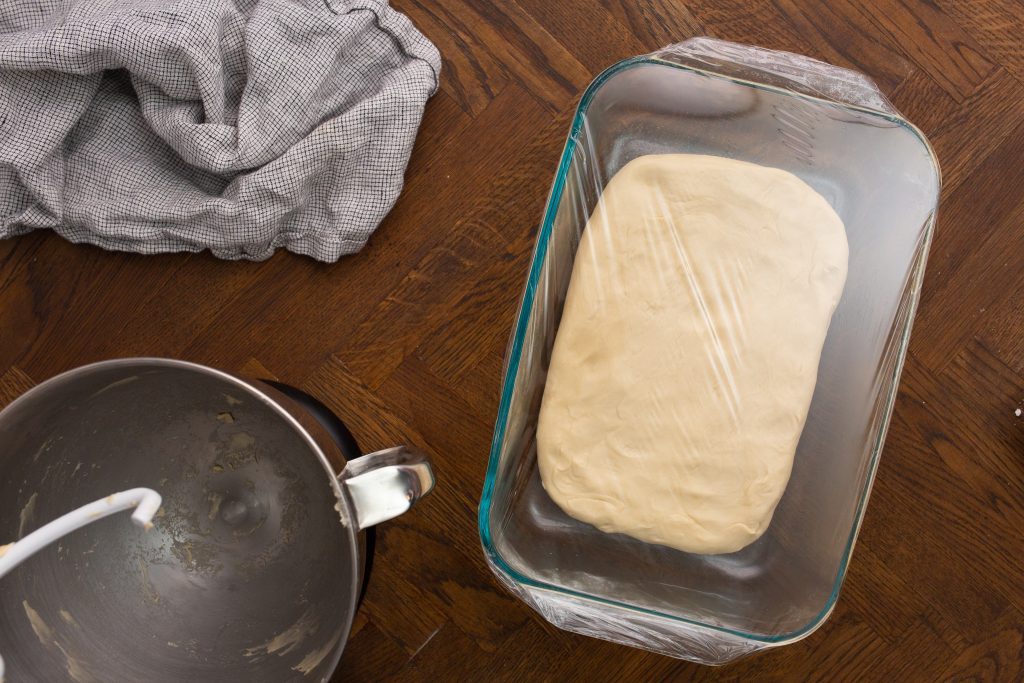
Next you will pre-shape the dough into a rectangle. This will make it easier to roll out in your final product. Gently pull the dough to create corners and use your fingertips as if you’re degassing the dough. This will help to gently stretch the dough by using pressure instead of pulling and tearing at gluten strands that are in the midst of developing.
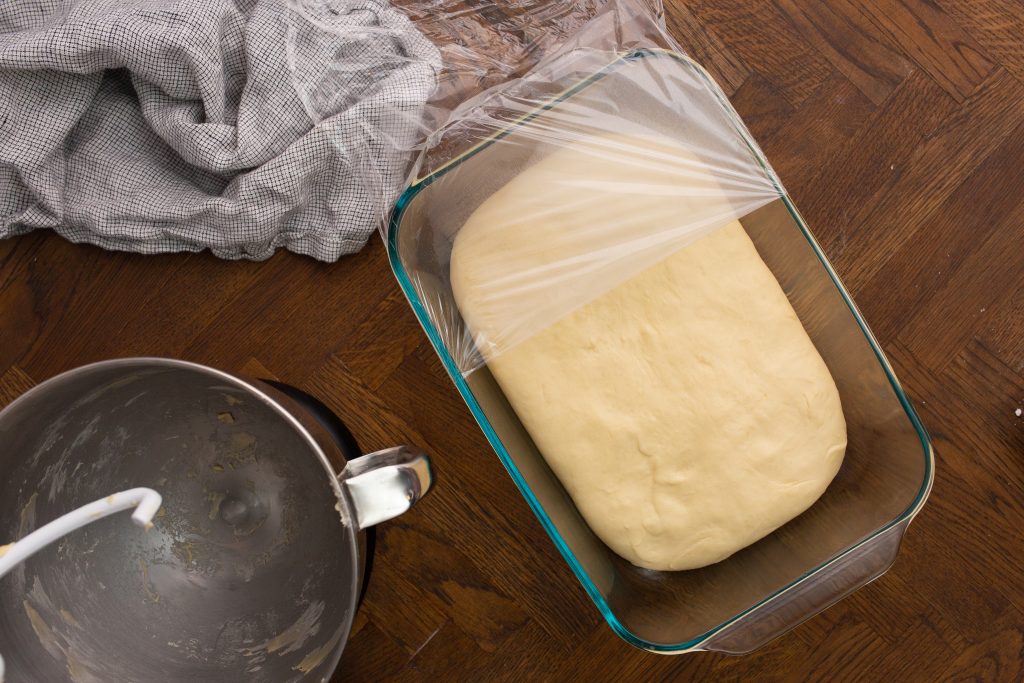
Place into a non-stick sprayed rectangular casserole dish or on a sheet pan, and cover with plastic wrap for initial fermentation. Set in a warm area of your house, often places like the top of the refrigerator or on a chair close to a woodstove are best. If you have an oven with a proof setting, feel free to use that. The temperature of proofing should be about 95F.
Another option is to set your oven to 200F. Once it comes to temperature, shut it off and give just a minute before adding your covered resting dough to the warm oven. Keep the door close to entrap the heat. Your oven will cool but keep enough heat in to jump start the yeast and provide a warm environment for gluten development. Give your dough about 1 hour or long enough to double in size.
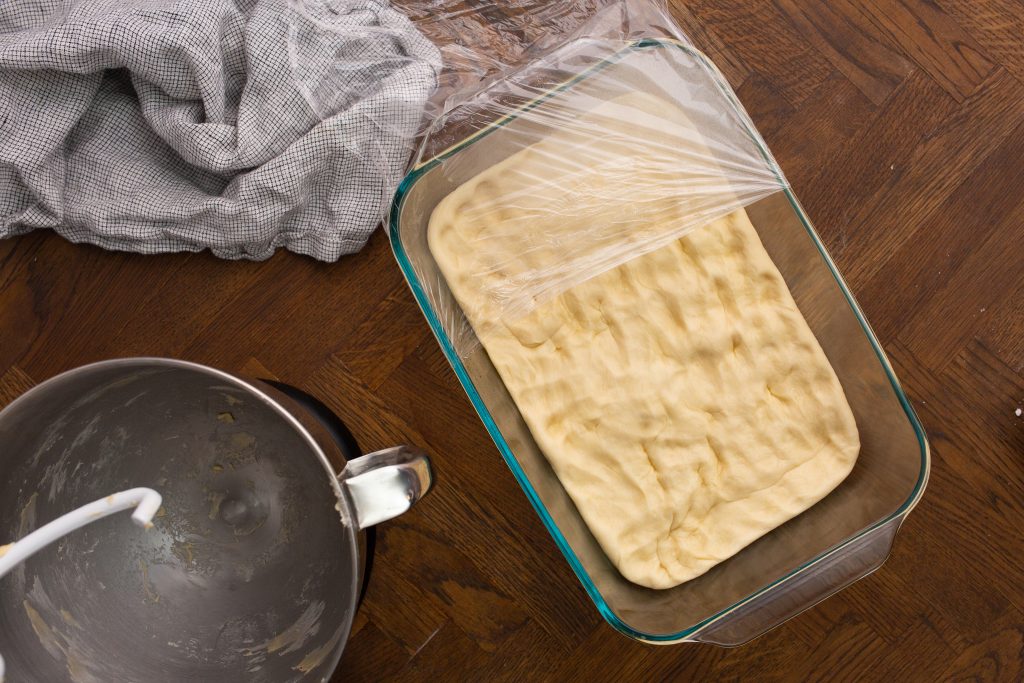
After doubled in size, transfer to the counter and use your fingers to degas the dough, keeping it in the rectangular shape. Transfer to either a large platter or small sheet pan and cover with plastic wrap. Chill in the refrigerator until firm, about an hour or overnight. Chilling the dough overnight will develop more flavor in the dough through the slow fermentation.
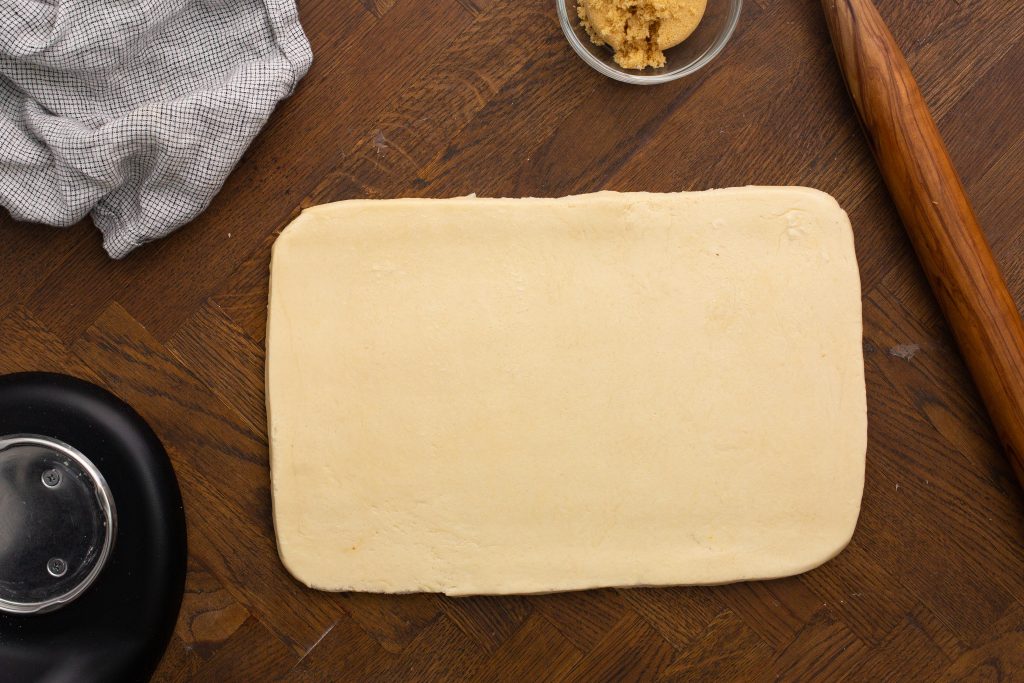
When ready to roll, dust your counter, top of the dough, and rolling pin very lightly with flour to prevent sticking. Because the dough is already in a rectangular shape, minimal rolling will be needed. This will prevent the gluten from being overly worked and causing too much friction to melt the butter within the dough.
Roll out to a 10 inch by 12 inch rectangle. When rolling the dough, turn the dough by 90 degrees and roll in one direction on each turn. This will prevent sticking and will be easier on your body. Give a tug at the corners to help the dough retain the rectangular shape.
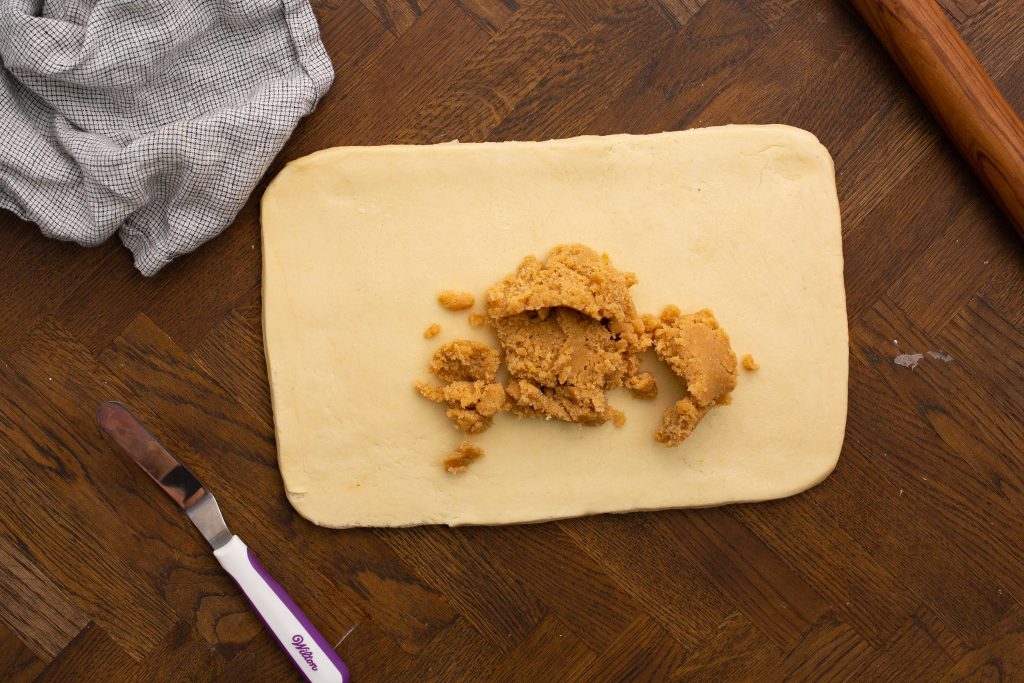
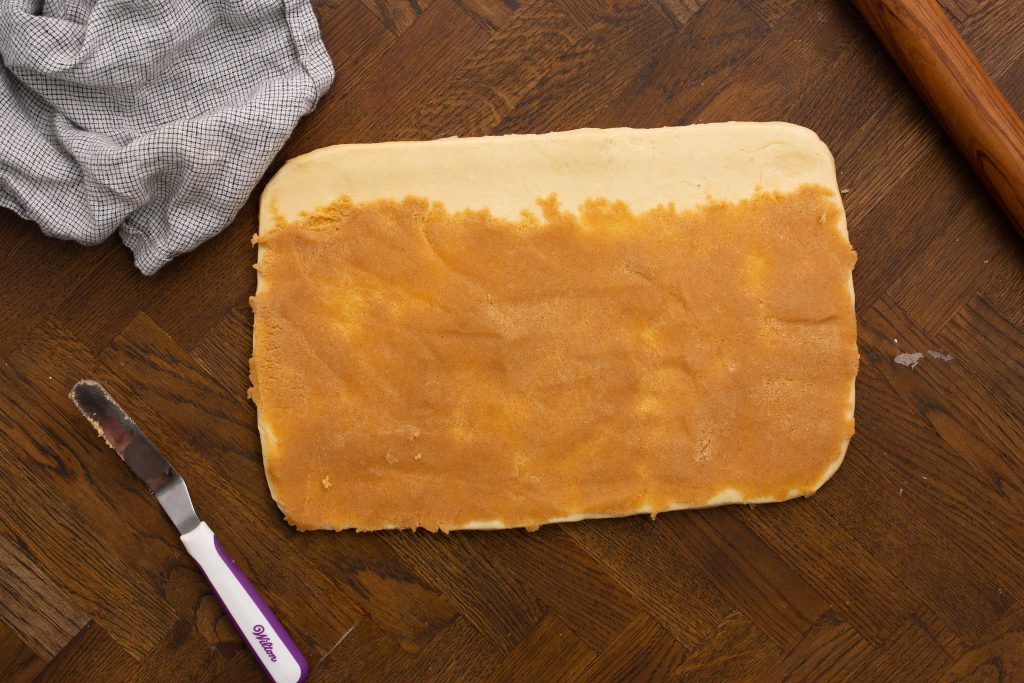
Scrape or spoon the filling mixture onto the dough and spread into an even layer. Leave 1/2 inch bare at the top of the dough for sealing. Bring the rest of the filling to the edges of the other three sides of the dough.
Bring the bottom edge up in a tight pinch to start. Continue to work your way up and keep your roll tight to prevent filling from oozing out during the final fermentation or baking process.
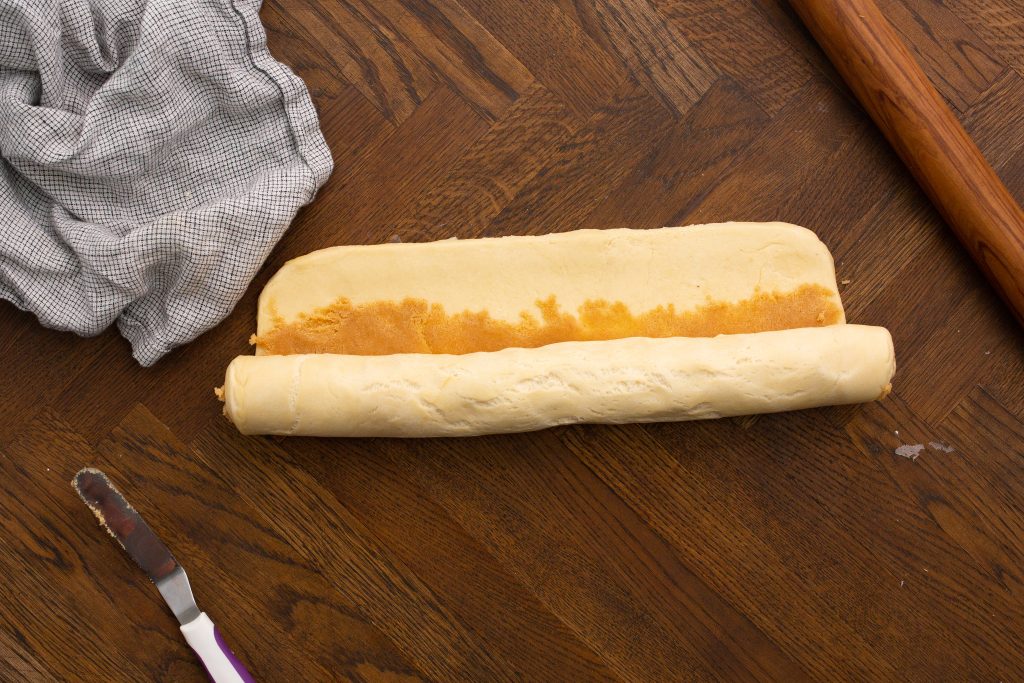
Once you’ve reached the end, pinch or press firmly to seal the dough. Roll on the seam gently to flatten the seam out. Chill the dough for about 30 minutes to an hour to help with cutting and retaining shape.
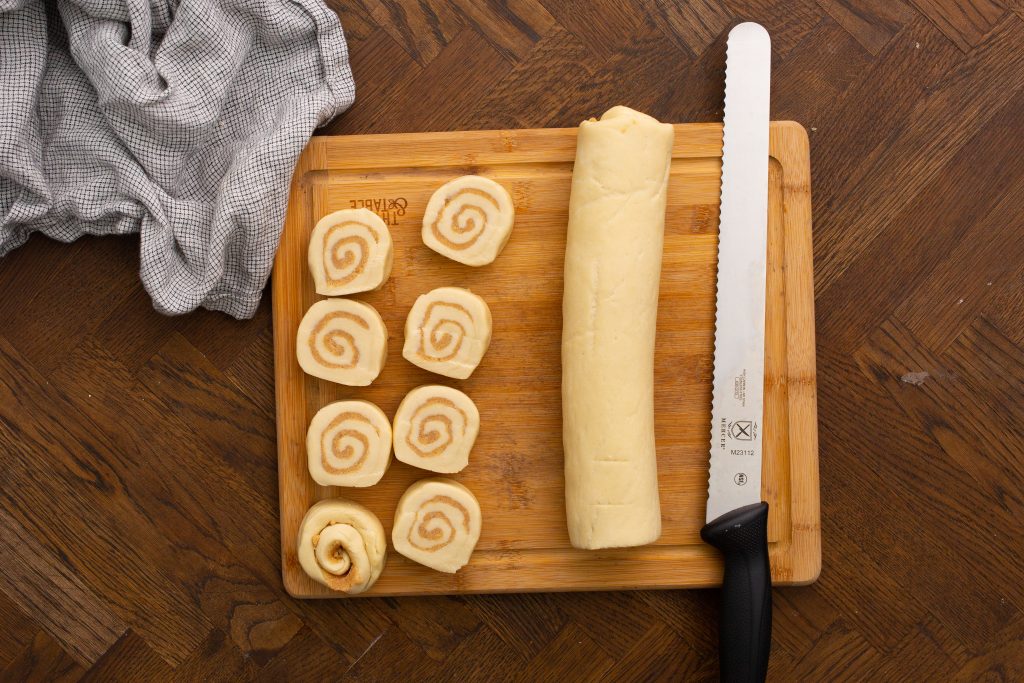
Trim the edge excess slightly. Use a serrated knife to cut the cinnamon rolls into 1 to 1-1/2 inch thick rolls. Using a serrated knife will prevent the cinnamon rolls from becoming squished. If using floss, make sure it is unwaxed and unflavored.
Chef Tip: Don’t squish the cinnamon rolls! Use a serrated knife to cut the dough roll after it has been chilled. This will actually prevent tearing and squishing of the dough, and prevent the filling from being pushed out.
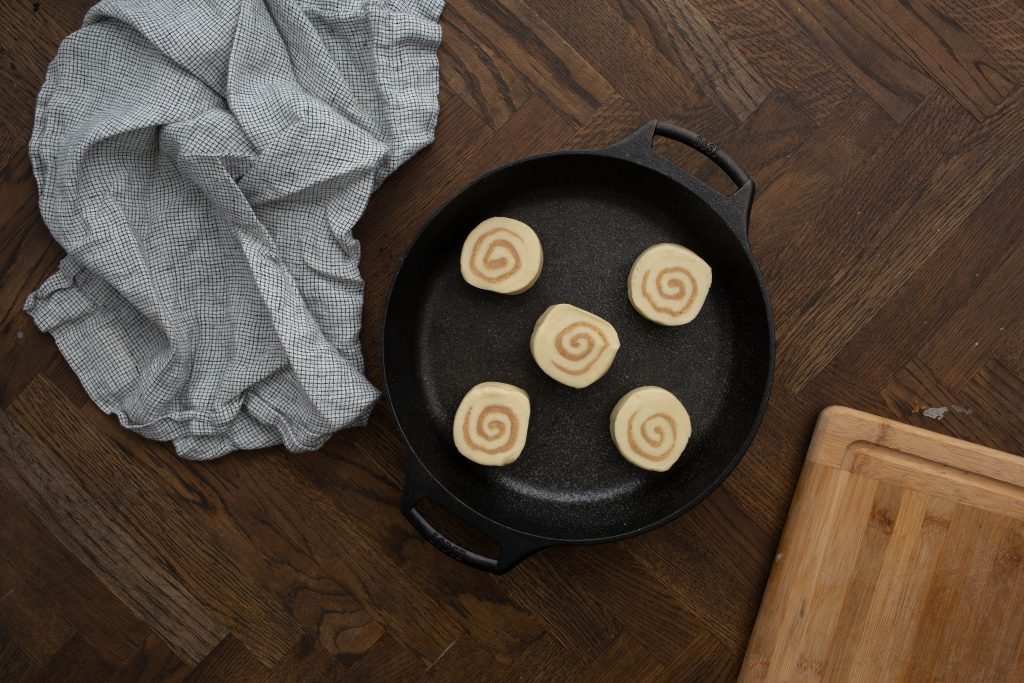
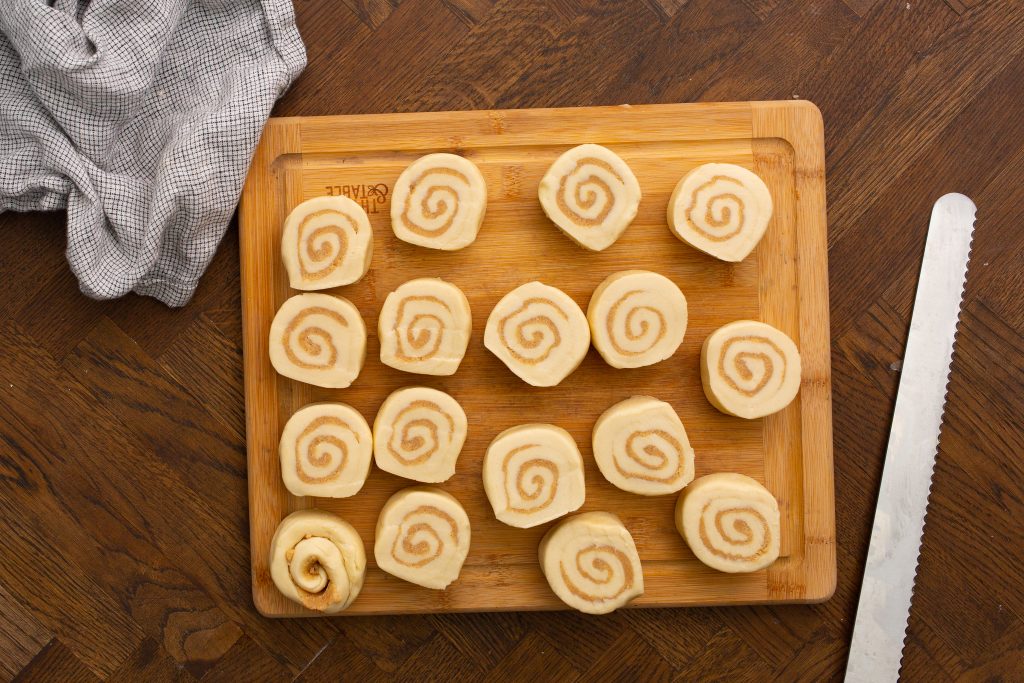
Place into a non-stick sprayed 12-inch skillet, or casserole dish, with the filling side up. Give each cinnamon roll about 1 inch of a gap between each other cinnamon roll and about 1/2 inch from the edge. When placing the rolls in the skillet, keep the seam of the roll pointed toward the outer edge of the skillet or pointed directly at a neighboring roll. That will help to keep it sealed and round.
Note that to allow adequate spacing you may need multiple skillets. Cover with plastic wrap and allow to double in size, about an hour. The rolls should almost fill the skillet at this point, or about double in size. One way to test is by lightly pressing on the side of the roll. The dough should indent and then very slowly spring back.
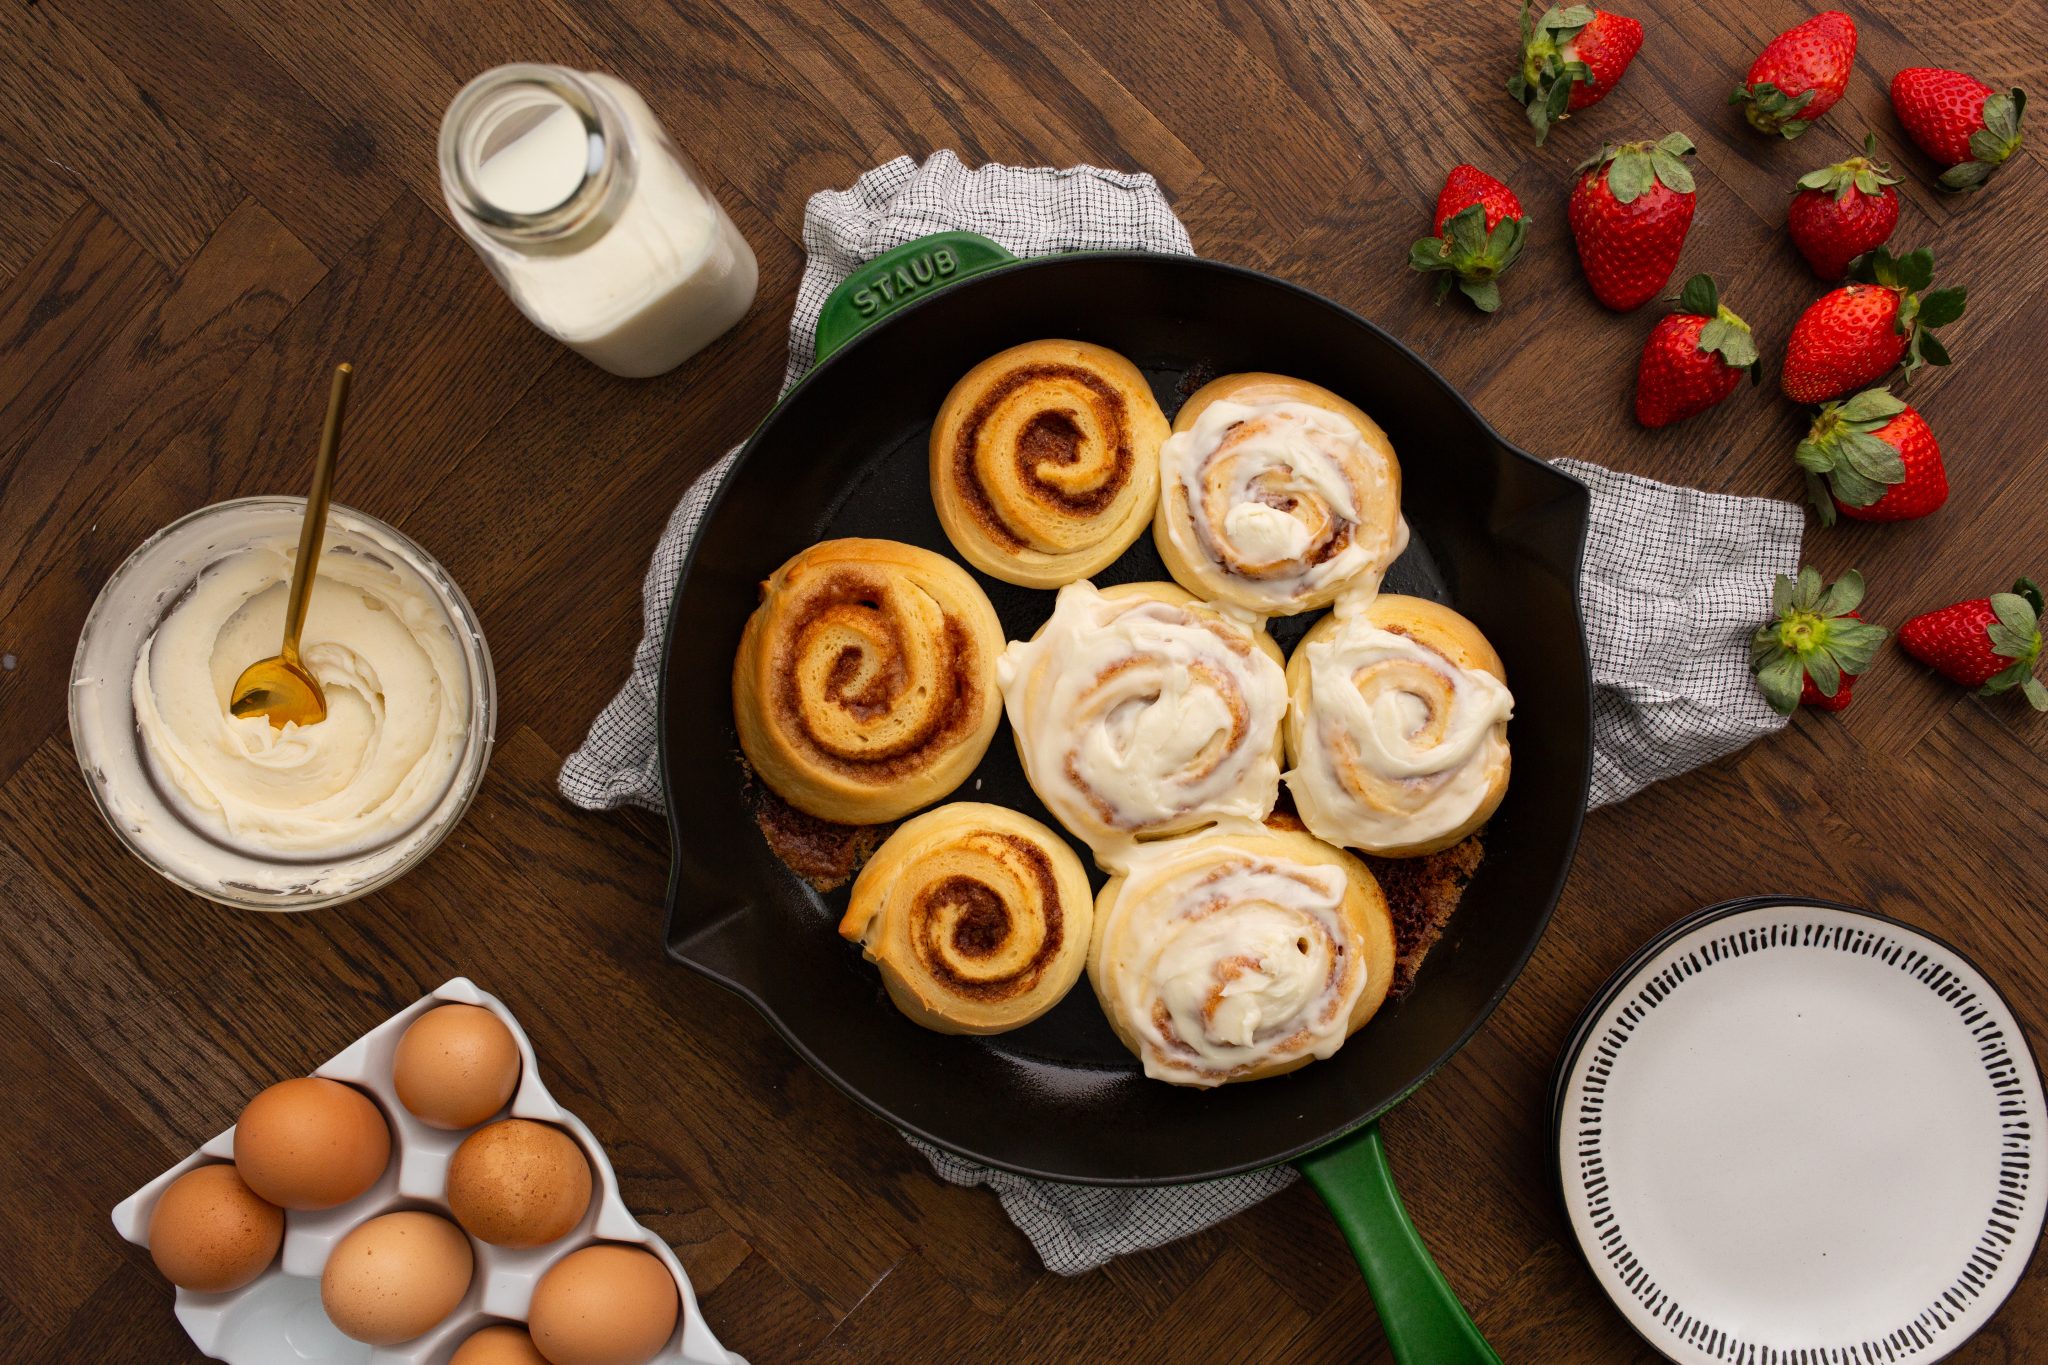
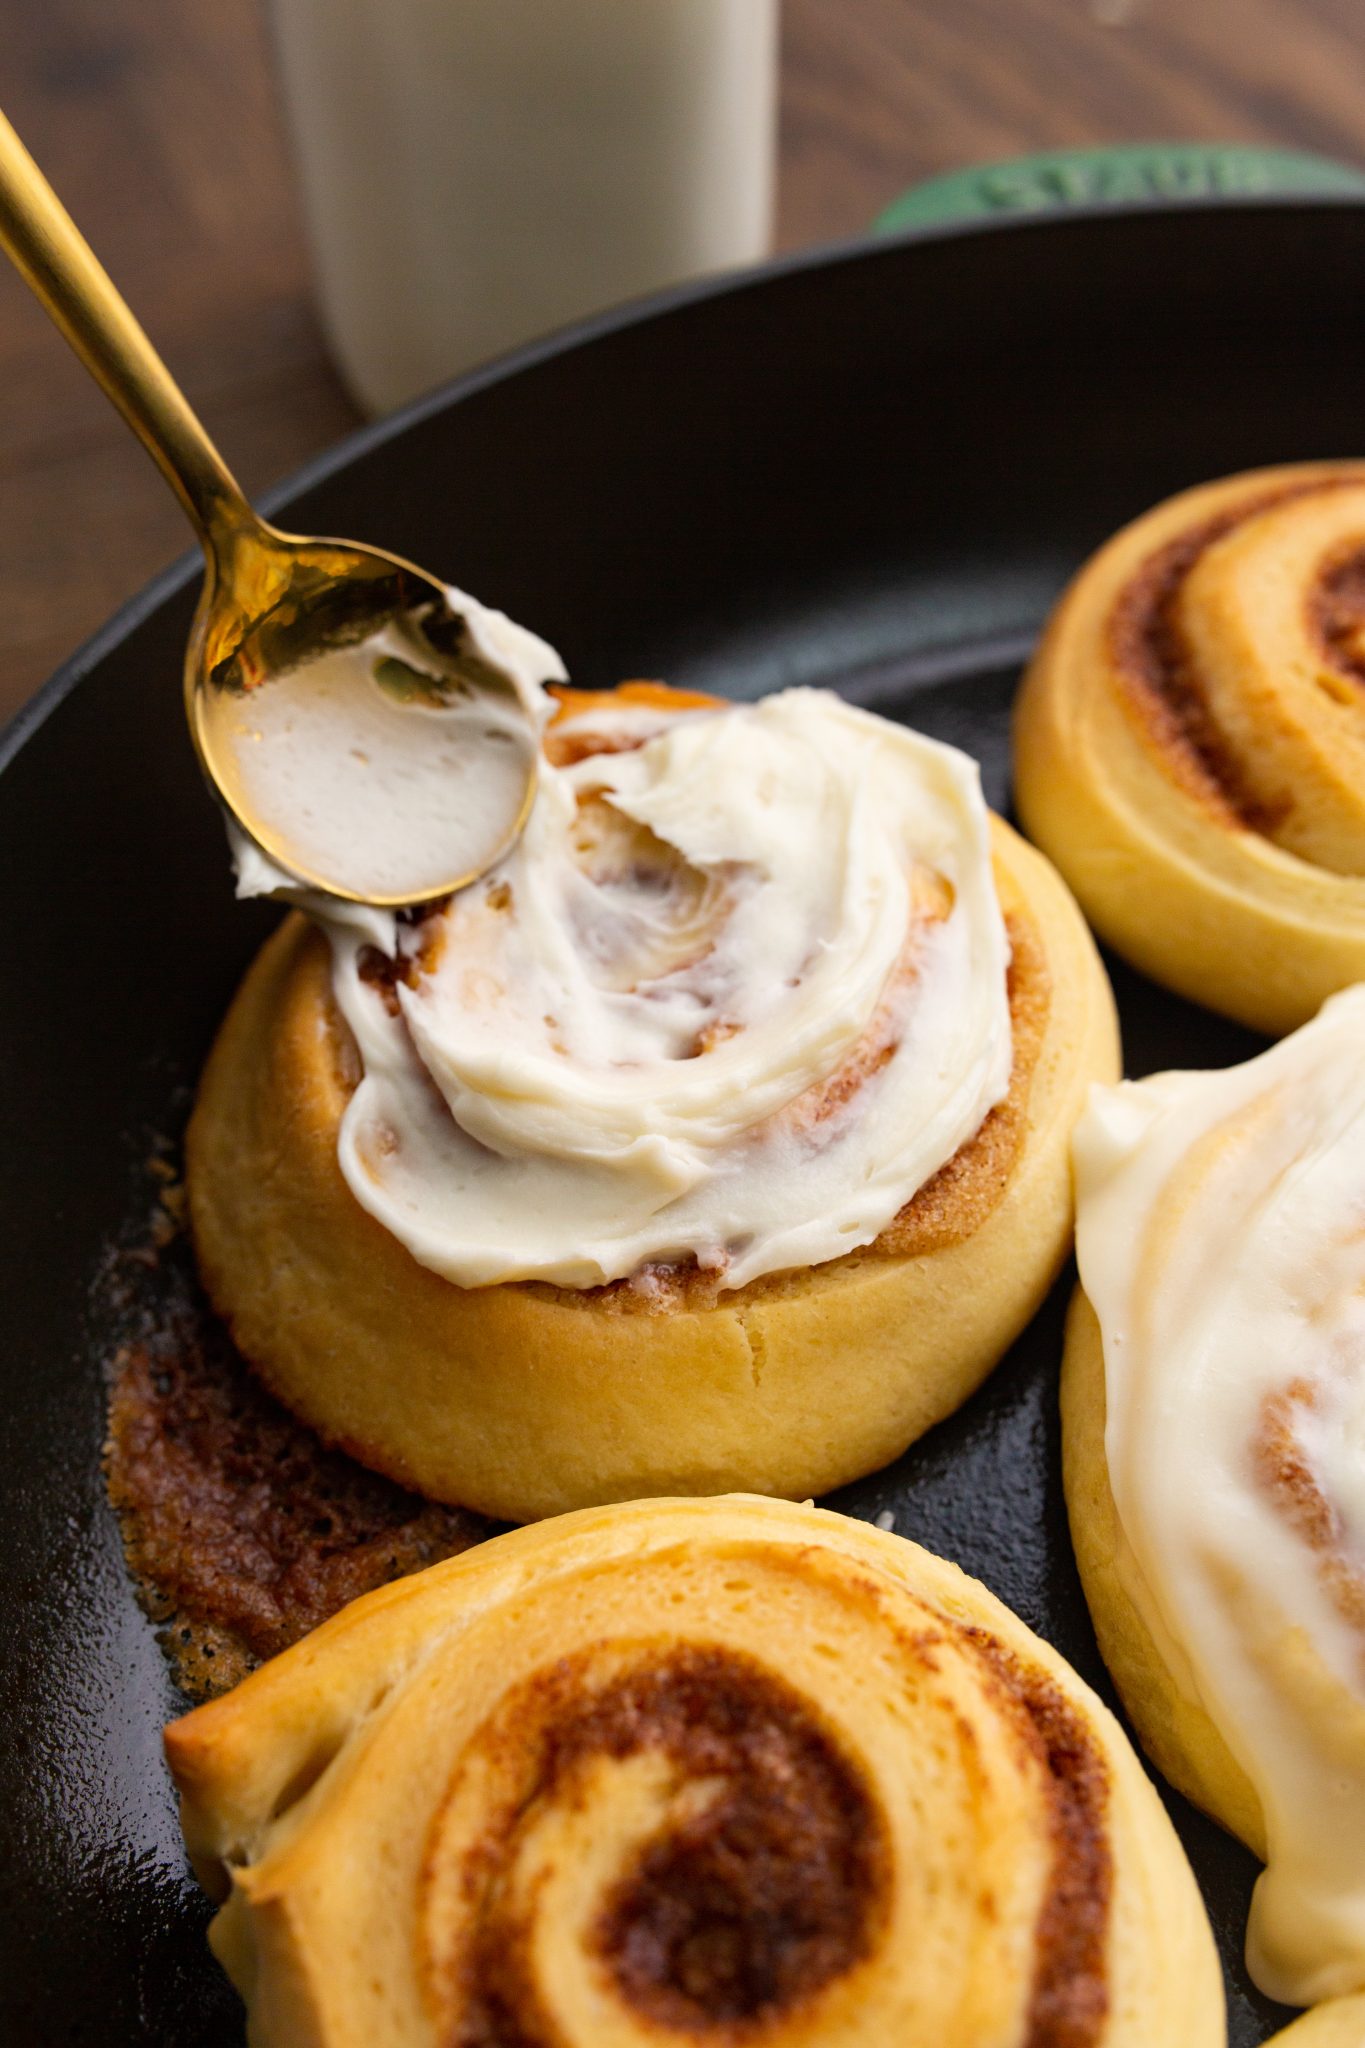
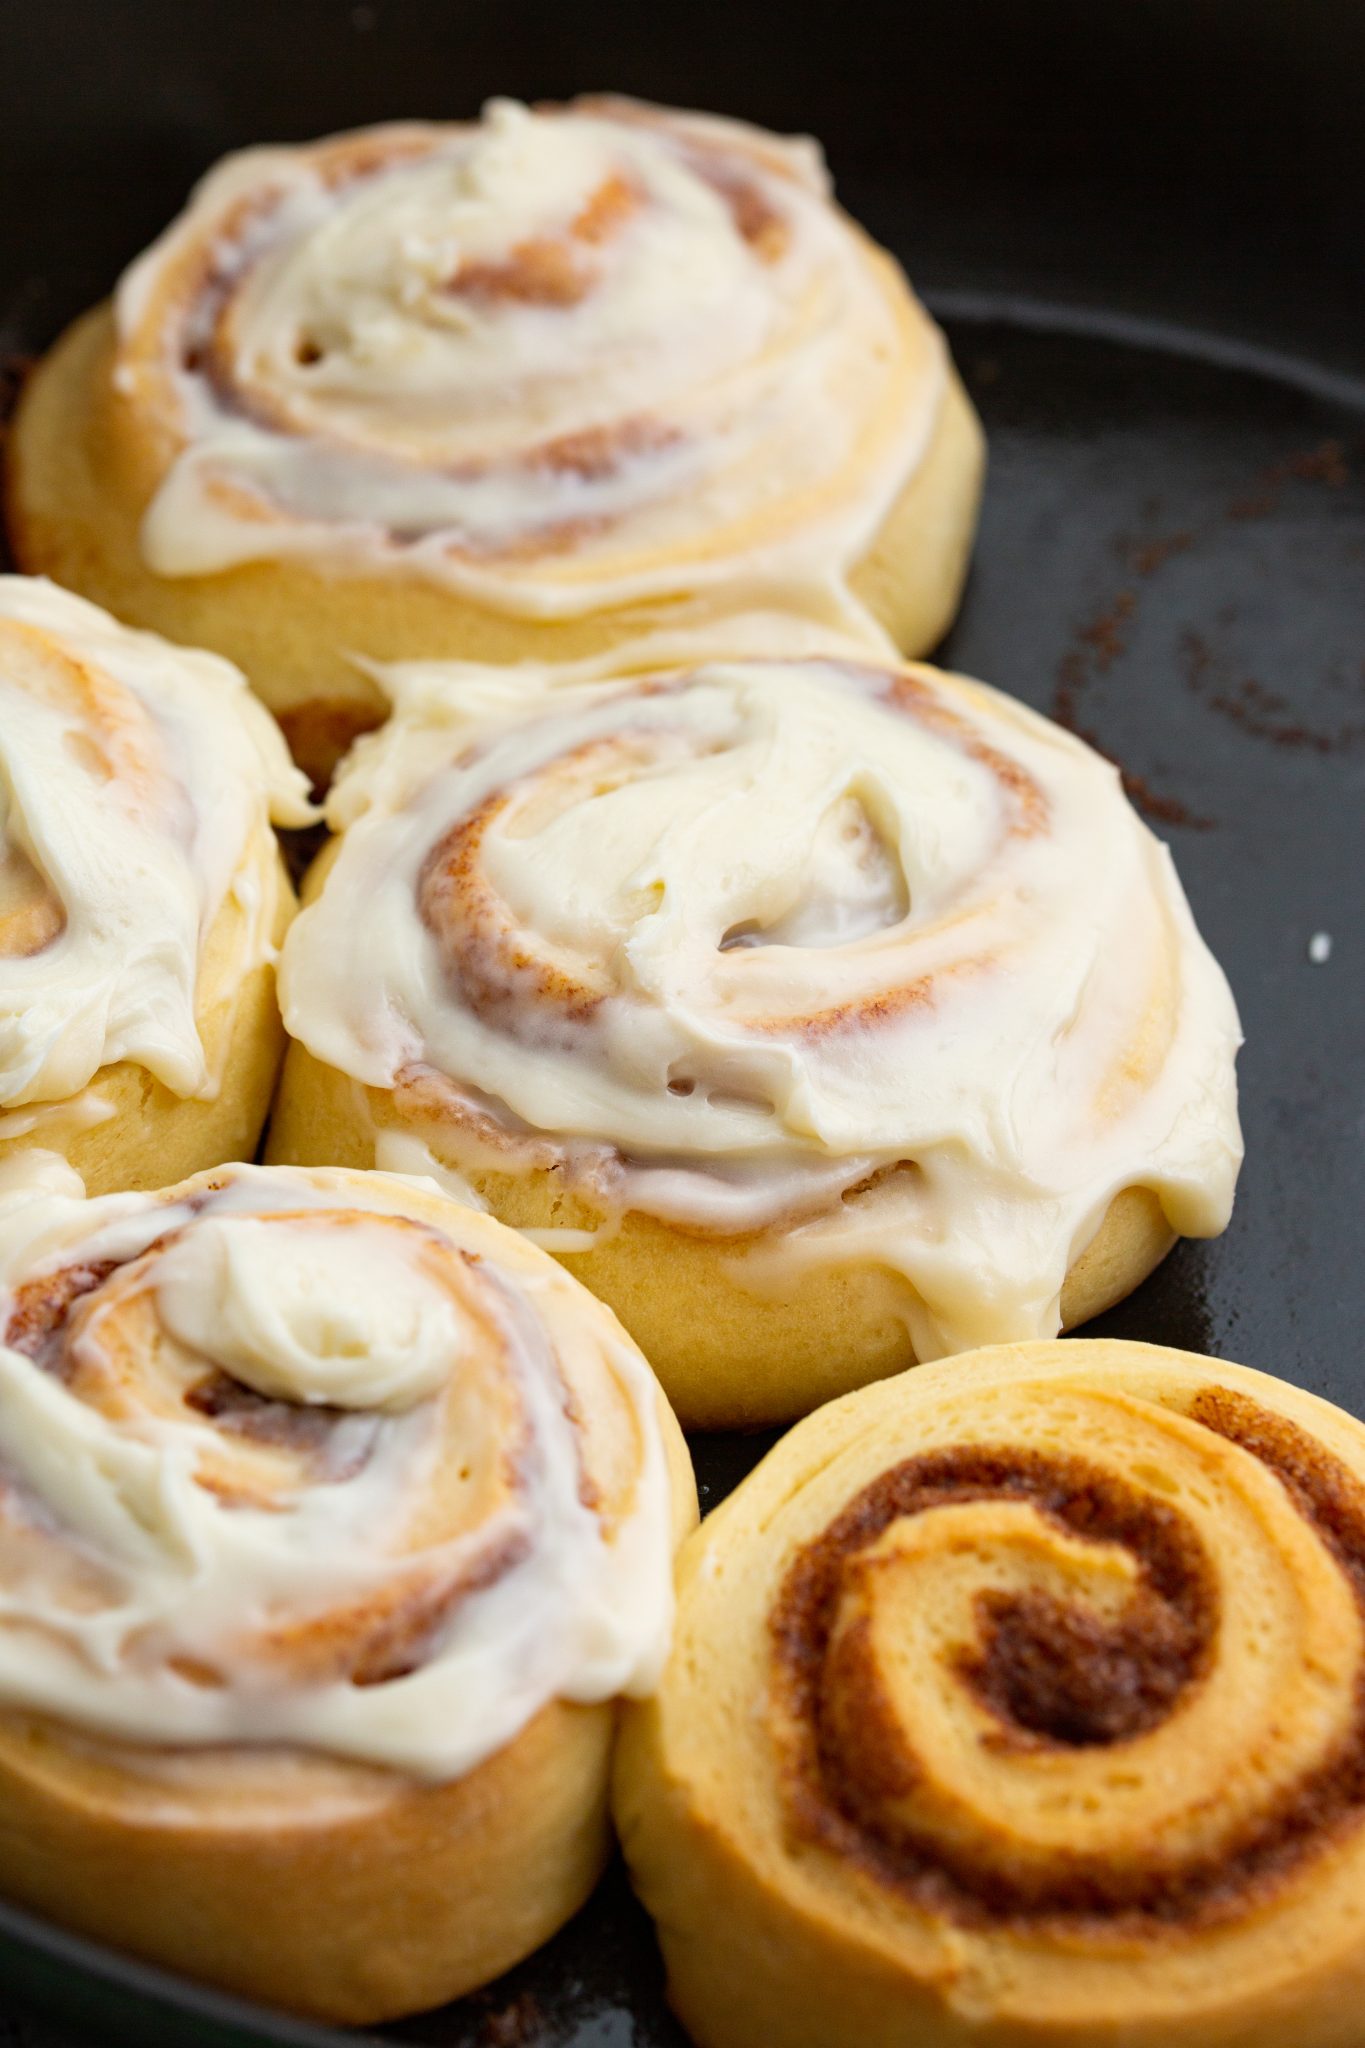
Bake at 350F for about 15-20 minutes. They will be golden brown and have a slight spring to them when the center is touched. Use an offset spatula to remove from the skillet after about 5 minutes of resting. Note that you can add frosting to your cinnamon rolls now and serve in the skillet, but clean up of the skillet is easier when frosting is done on a platter instead.
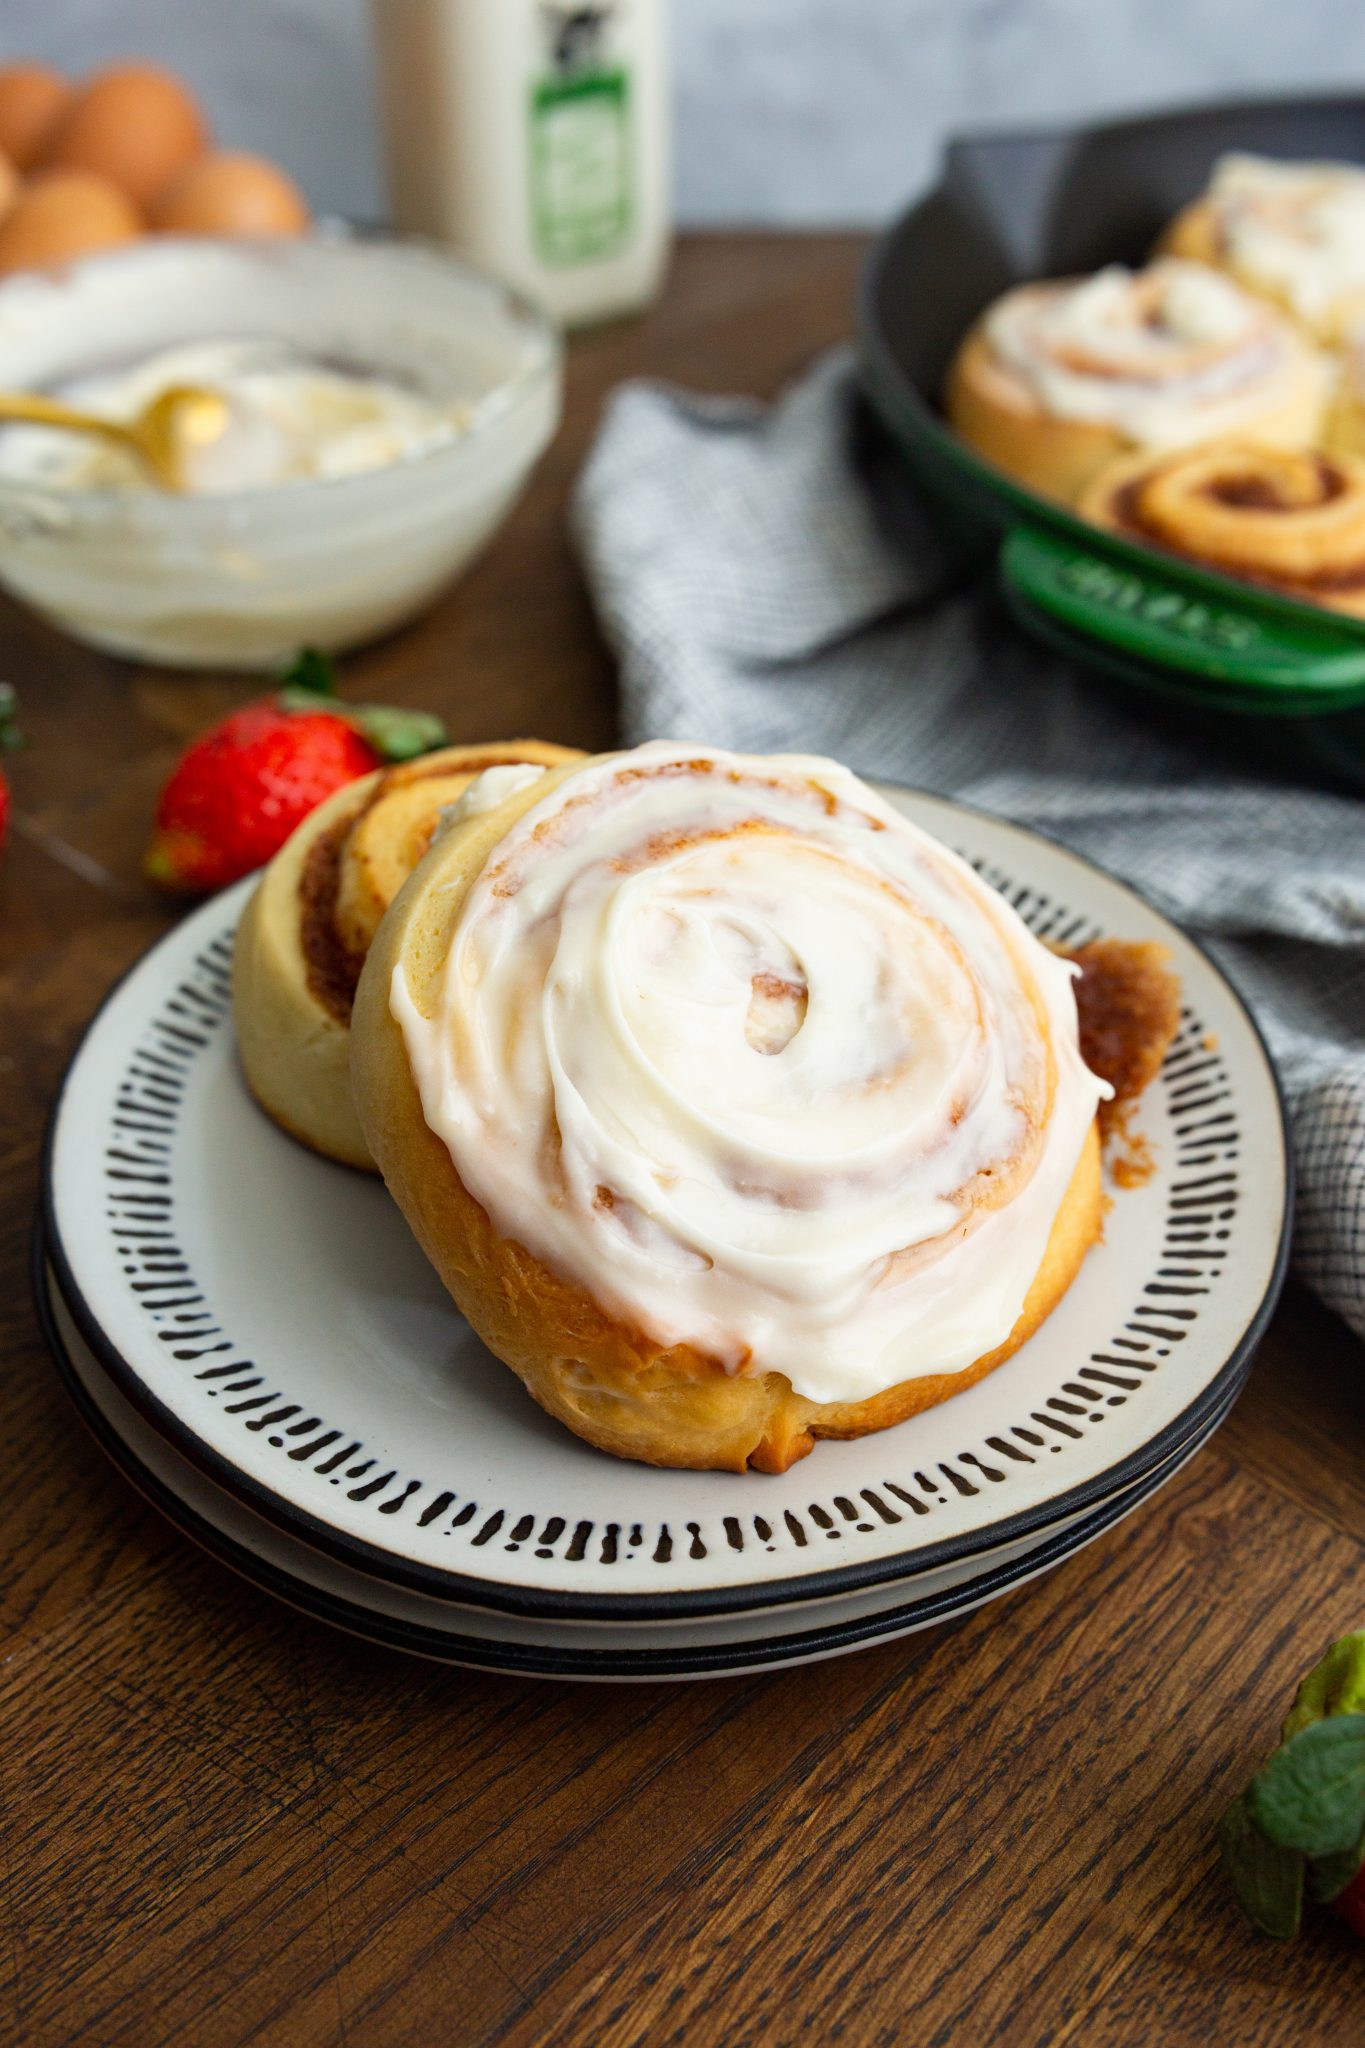
Spread the frosting on the top of the cinnamon rolls and serve!
Top Chef Tip – Chill the Dough!
Cinnamon Buns are made from a sweet dough (hence why they’re also called sweet rolls) that is low in hydration and high in fat. After being chilled the dough should feel and have the elasticity of clay.
When rolling, as long as the dough is cold it will not need flour on the surface. Adding too much additional flour for rolling will make the dough tough. A light dusting on the table or rolling pin is fine.
Meet the edge of your dough with the rolling pin, do not roll the actual edge or it will squish the dough and create uneven end pieces. Roll with firm, even pressure to the size of x by x, tugging at the corners as needed for even sides.
Chef Tip: Listen to the dough! If your dough keeps springing back on you and is failing to maintain it’s shape during the rolling process, that is the gluten telling you it’s tired. Give the dough a couple minutes (up to 10 minutes) to rest and then continue rolling.
The key to making cinnamon roll filling that doesn’t leak out.
Using the creaming method, and a clean stand mixer fitted with a paddle attachment, cream the softened butter on medium speed, just enough to really spread it out in the mixing bowl.
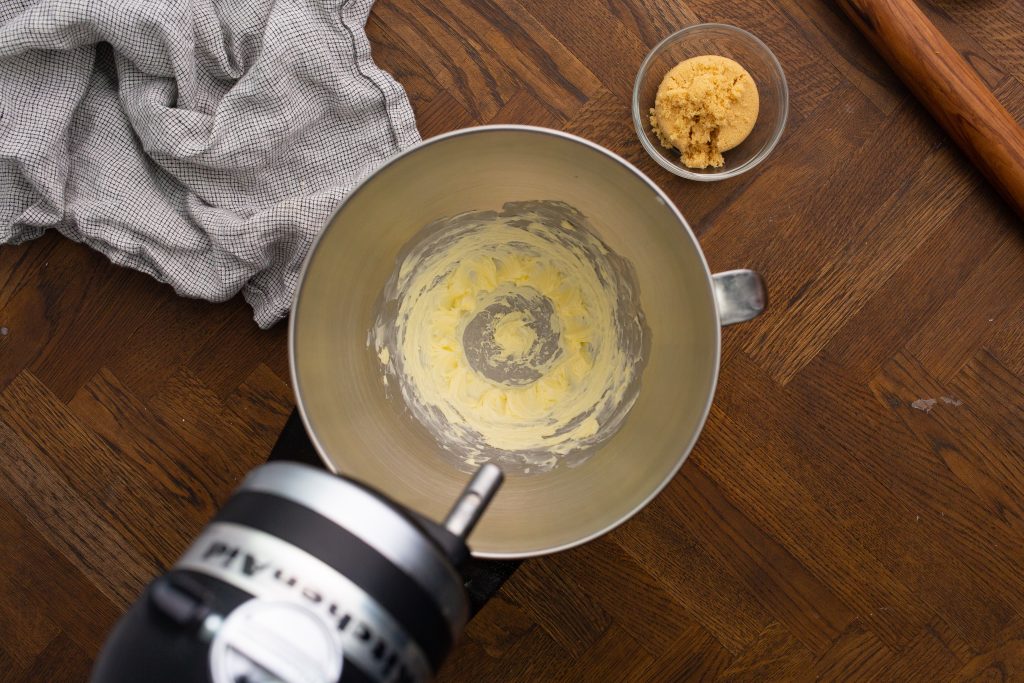
Add the sugars to the butter. Mix on high speed for about 5 minutes until well combined. Scrape down the bowl as needed. It should look light and getting fluffier.
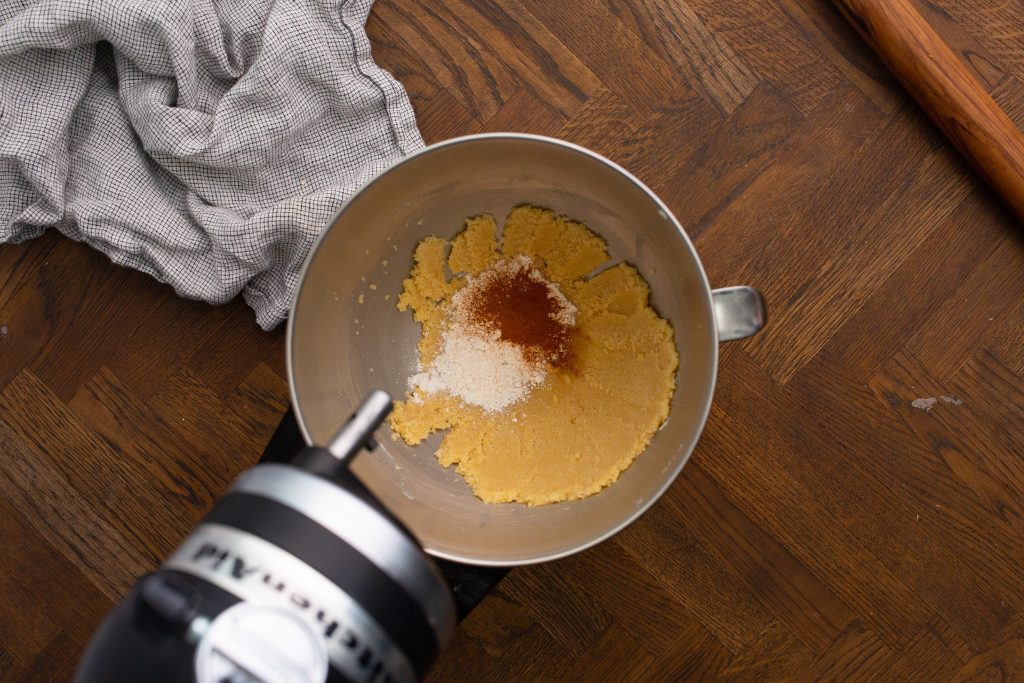
Add the flour and cinnamon and mix on low so as not to get flour splashed outside the bowl. This should only take about 30 seconds to combine fully. Use a rubber spatula to scrape the sides and base of the bowl and finish combining by hand. Transfer to a bowl and cover with plastic wrap.
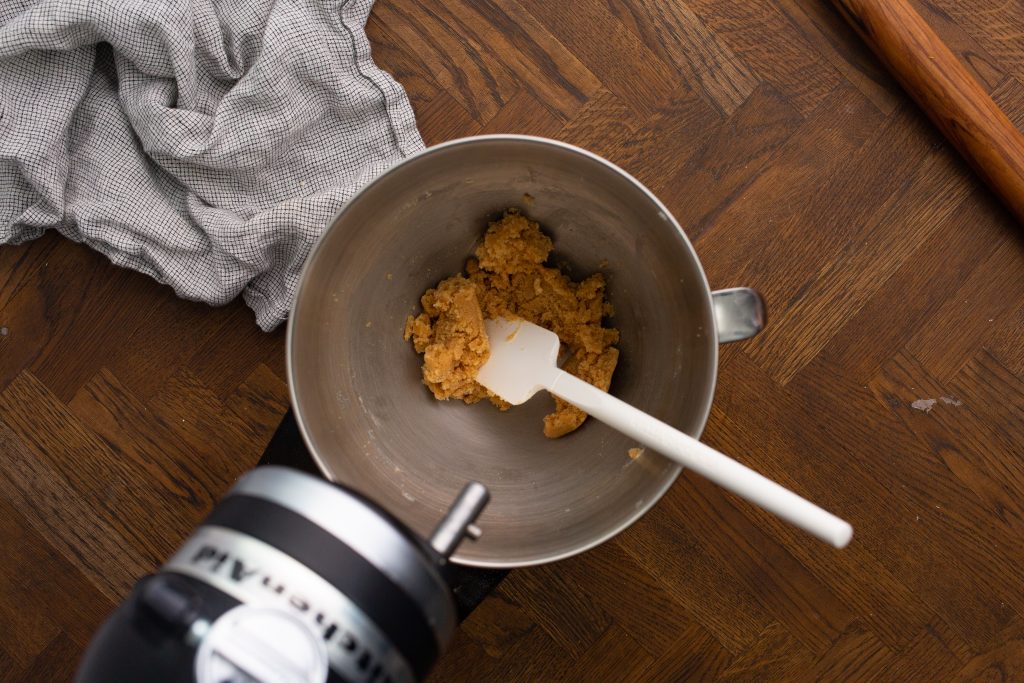
Creating a thick, fluffy, spreadable filling for the cinnamon buns will help prevent the filling from seeping out during baking as you would find with melted butter and cinnamon sugar being brushed onto the dough in most recipes. A thicker filling is one reason my Apple Butter works so well as a cinnamon roll filling!
Other filling & topping ideas for cinnamon rolls
Filling Ideas
- Pastry Cream
- Rum Soaked Raisins
- Almond Cream (a French choice)
- Lemon Curd
- Thick Jam
- Apple Butter
Topping Ideas
- Cream Cheese
- Sticky Bun Schmear
- Flat Icing (which is shelf stable)
- Royal Icing (uses egg whites)
- Mascarpone Icing
- Meringue
How to make cream cheese frosting for cinnamon rolls
Take the opportunity to cream the frosting while the dough is in the initial fermentation phase. Once the frosting has come together, you can chill it in the refrigerator in a wrapped bowl until ready to serve. That way there is one less thing to wait for once the cinnamon rolls are ready to eat.
Note that you’ll want to take the frosting out of the refrigerator at the same time that the cinnamon rolls come out of the oven. This will give the frosting time to soften at room temperature before trying to spread onto the tender rolls.
It will take about 3-4 hours for both the cream cheese and butter to come to room temperature. So be sure to pull out butter and cream cheese in the morning before starting your dough. Using chilled or unevenly softened ingredients will result in lumps in your final product.
To the bowl of a clean stand mixer fitted with a paddle attachment, add the cream cheese, butter, and vanilla extract. Cream on medium speed, scraping down the bowl and paddle as needed, until well combined. Mix for about 2 minutes total to allow slight aeration to the mix, but not enough friction to be melting the butter.
Add in the sifted powdered sugar, again to reduce clumps. Mix on low speed to prevent a cloud of powdered sugar from overtaking you, until the mix comes together. Then increase to medium speed and mix until it has come together and is smooth, about 2 minutes total. The frosting will be slightly stiff on a rubber spatula.
At this point, add in less than a Tablespoon of milk or cream at a time, mixing and scraping the bowl and paddle attachment, until the consistency of the frosting becomes easily spreadable. Not so thin that it runs off a spoon, but thin enough to use the back of a spoon or offset spatula on a piece of parchment paper with ease. This frosting can be made ahead of time or batch made, and kept in the refrigerator for about a week or in the freezer for a month.
How long do Cinnamon rolls last
Leftover baked cinnamon rolls should be eaten the next day. Any farther out and they get quite dry and loose their fluffy integrity. Your best bet for anything farther out is to follow my tips below for make-ahead cinnamon rolls.
Make-Ahead Cinnamon Rolls
You can make these cinnamon rolls the night before. Follow the recipe all the way through and bake. Then cover with plastic wrap in the refrigerator overnight. The next morning, refresh them in the oven.
For a fresh bake and making-ahead, freeze the sliced cinnamon buns on a sheet pan. The night before you want them, take them out of the freezer and arrange them in your cooking vessel of choice. Pop that in the refrigerator overnight. They will thaw and proof slightly.
The next morning, remove from the refrigerator and let sit on the counter for an hour to take the chill off and finish proofing. Then bake as directed for fresh from the oven make-ahead cinnamon buns. Sliced cinnamon rolls can be kept in the freezer for about a month before the yeast begins to die off and the rolls take on freezer flavor.
The importance of temperature in ingredients.
Baking, and baking professionally, is truly a science. Each recipe is written with precision to ensure it works every time. Whereas in culinary recipes, there is room enough for error that can be creatively fixed, baking is not so easy. The temperature of ingredients noted plays a huge roll in how texture in batters, doughs, and final products end up. Melted butter is not the same as room temperature butter, for example, and can cause the ingredients to not be fully incorporated as needed. All that to say, yes. Temperature matters. Do what the recipe says.

Chef Notes and Tips
FAQs and Troubleshooting
Pin It or Share on Facebook!

Classic Cinnamon Buns
Equipment
- 12 inch cast iron skillet
- cast iron casserole dish
- stand mixer
- rubber spatula
- thermometer
- Bowls
- plastic wrap
Ingredients
Dough
- 500 grams All-Purpose Flour
- 75 grams Sugar granulated
- 11 grams Yeast instant
- 10 grams salt
- 225 grams Whole Milk 90-100F
- 63 grams Whole eggs room temperature (1-2 eggs)
- 75 grams Unsalted Butter softened
Filling
- 85 grams Brown Sugar
- 85 grams Granulated Sugar
- 68 grams Unsalted Butter softened
- 14 grams All-Purpose Flour
- 2.5 grams Cinnamon ground
Cream Cheese Frosting
- 180 grams Powdered Sugar sifted
- 32 grams Unsalted Butter softened
- 90 grams Cream Cheese room temperature
- 6 grams Vanilla Extract
- 0.5 grams Salt
- 25 grams Heavy Cream or whole milk
Instructions
Dough
- In the large bowl of a stand mixer combine warm milk and instant yeast. Let sit for about 5 minutes. Milk should not exceed 70F.
- Add remaining dough ingredients except for the butter. Mix the dough until incorporated. Dough will pretty well clean the bowl.
- Add the butter and continue to mix on medium speed until butter is fully incorporated into the dough, about 8 minutes.
- Remove dough from the bowl and shape into a rectangle. Place in a 9×13 casserole dish or on a non-stick sprayed parchment lined sheet pan, covered with plastic wrap, and allow to ferment for 1 hour in a warm spot.
- Degas the dough. Wrap and chill for 1 hour up to 12 hours covered, in the refrigerator.
Filling
- In the bowl of a stand mixer, cream the softened butter with a paddle attachment.
- Add the sugars and cream until light brown in color and aerated at medium speed, scraping down the bowl as needed.
- Add the flour and cinnamon to the sugar and mix until combined. Store at room temperature for same day use or up to 3 months refrigerated.
Topping
- To the bowl of a stand mixer fitted with a paddle attachment, cream together the softened butter, room temperature cream cheese, salt, and vanilla extract until smooth.
- Add the sifted powered sugar and mix until smooth, scraping the sides as needed.
- Add the heavy cream or milk one Tablespoon at a time until the desired consistency is met. Store refrigerated until ready to use up to 2 weeks.
Assembly
- Degas the chilled dough. Transfer to a very lightly dusted work surface, maintaining the rectangle shape as much as possible. Lightly dust the rolling pin.
- Roll out the dough to be about 12 inches by 14 inches and 1/4 inch in thickness.
- Use an offset spatula to spread the filling in an even layer, leaving 1/2 inch of bare dough at the top. Be sure to spread the filling all the way to the edges on the other three sides.
- Roll the dough from the bottom like a jelly roll. Pinch the seam closed. If dough is soft or feeling greasy at all, roll the log onto its seam and chill for about 30 minutes.
- Use a serrated knife to cut equal pieces, about 1-1/2 inch in thickness. Place the rolls seam side out or seam side adjacent, into a lightly sprayed cast iron skillet, leaving about 1 inch spacing between rolls.
- Allow to rise 3/4 of the way, about 1 hour.
- Bake at 350F for about 15-20 minutes, until the center of the rolls spring back.
- Cool slightly and top with icing.
Notes
Nutrition
Did You Make This Recipe?
Share it with me on Instagram @castironrecipesofficial and follow on Youtube @Cast Iron Recipes and Pinterest @castironrecipes for more!

Become A Recipe Insider!
Subscribe to the newsletter for all the latest scratch-made and family-friendly recipes
Leave A Review!
Love this recipe? Make sure to comment below and let me know your thoughts!