
Stovetop Caramel Whiskey Apple Butter
This post may contain affiliate links. We participate in the Amazon Services LLC Associates Program, an affiliate advertising program designed to provide a means for us to earn fees by linking to Amazon.com and affiliated sites at no extra cost to you.
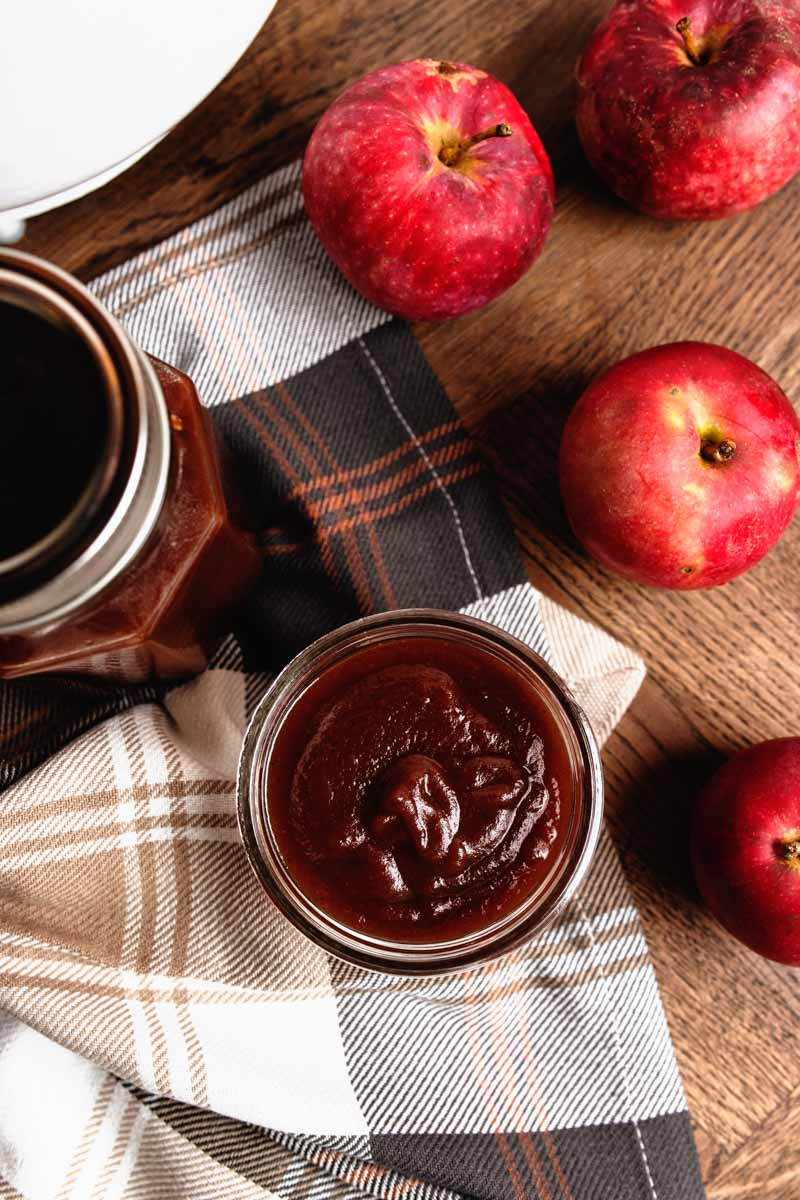
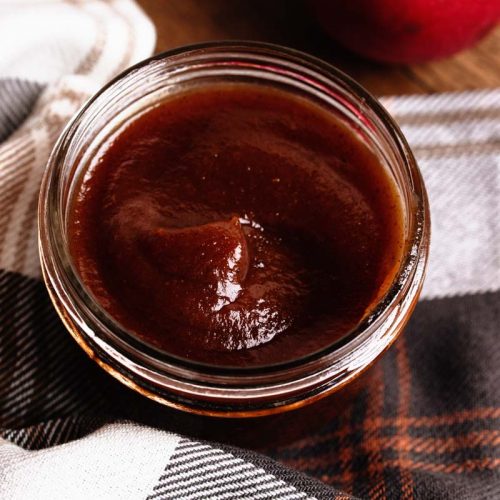
Easy to make, Stovetop Caramel Whiskey Apple Butter is a new favorite in our house. Using apples right from our own trees, local honey, and perfectly distilled caramel whiskey – this apple butter is perfect as a holiday gift even if you want to keep it all for yourself.

Stovetop Apple Butter
Is it apple sauce? Is it butter? Contrary to the name, it’s neither. Apple butter has no dairy in it at all but rather refers to the texture of the condiment in thickness and ease of spreading on your favorite breakfast item. Thick, creamy, and luscious in every way, apple butter showcases the same flavor profile of homemade applesauce while being a bit more decadent.
The Inspiration for Caramel Apple Butter
I could attribute this recipe to a few things. First off, we got a new Dutch oven. While I got it for my other job (food photography for other food blogs), I couldn’t help but oogle over the clean white of a fresh enameled dutch oven. Knowing how difficult it can be to photograph a dark food, like apple butter, in a dark cast iron pot I thought the white Dutch oven would do so well in showing off the silky texture of this caramel apple butter. And boy was I right!
Secondly, it is apple harvest season. This is our first apple harvest and first fall on our new homestead. Apples have been one of those fruits I have had to go to the store for nearly every other day. Our children simply devour them. And while the trees on the property are in need of some desperate love and care, they’ve proved to be bountiful and provide sustenance in more ways than eating them straight from the tree.
Thirdly, there is nothing – and I mean NOTHING – that I love more when it comes to fall flavors than caramel apple! When we make apple cider, I add caramel. When we have apple pie or apple crisp, I’m going to drizzle caramel on it. When we go to the local fair, I’m going to get a caramel apple. And while I could have made an actual caramel sauce to blend in with this apple butter, I knew my ultimate goal with at least a jar of this was to make Apple Butter Sweet Rolls (or Cinnamon Buns). So I opted to use a salted caramel whiskey we have on the shelf.
Tools You’ll Need
To make this recipe start to finish, including the water bath canning, you’ll need these items:
- 5-6 Quart Dutch Oven
- Cutting Board
- Peeler
- Knife
- Kitchen Scale
- Measuring Spoons
- Wooden Spurtle or Spoon
- Immersion Blender or Countertop Blender
How to make Stovetop Apple Butter Step-by-Step
Start by washing your apples. Apples from the store often have a layer of wax on them. You’ll want to use warm water to soak the apples for about 15 minutes, and a clean cloth towel to rub the water and wax off. Your best bet is to do this with fresh-picked apples as well in case any pesticides were used during the growing season.
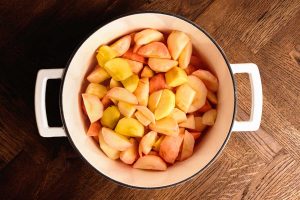
Once cleaned, peel and core the apples. While you don’t HAVE to peel the apples, I did since we were dealing with blemished apples. You absolutely can leave the peels intact though for added nutrition. Once the apples are cored, dice the apples into equal sizes. The size doesn’t matter really as long as the size is consistent for equal cooking across the pot.

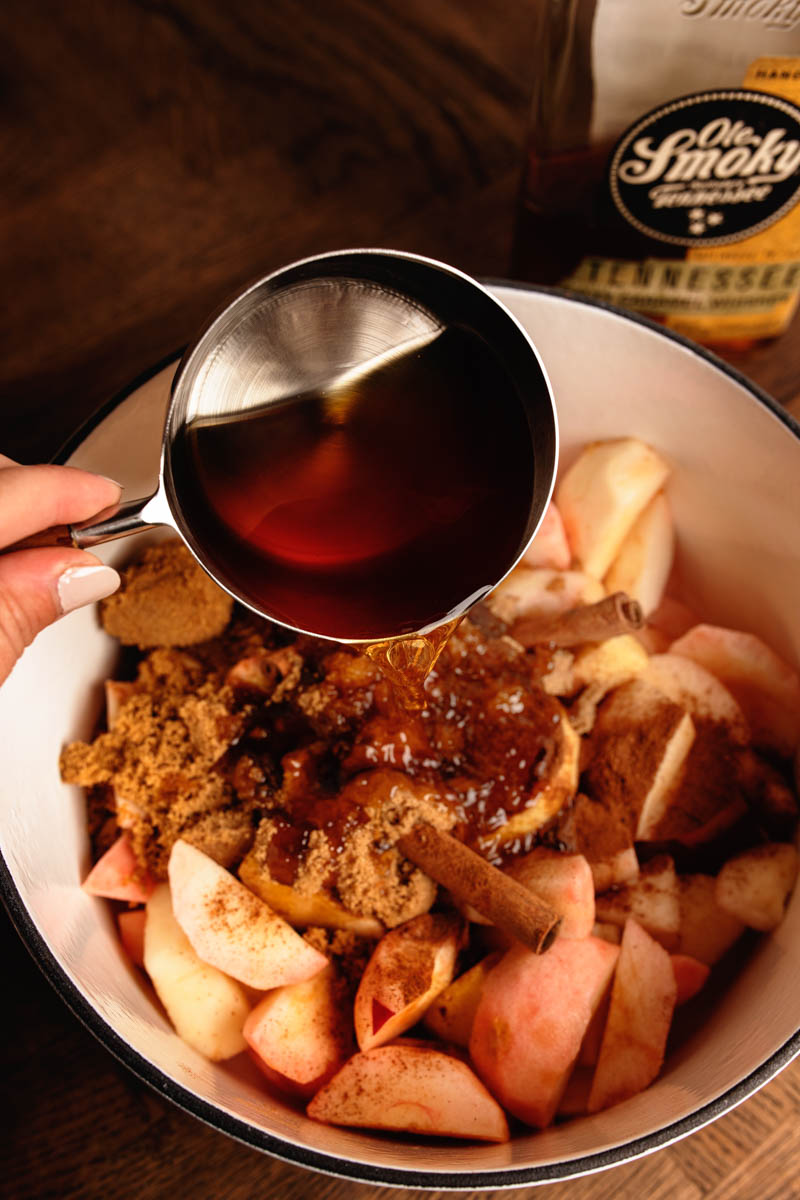
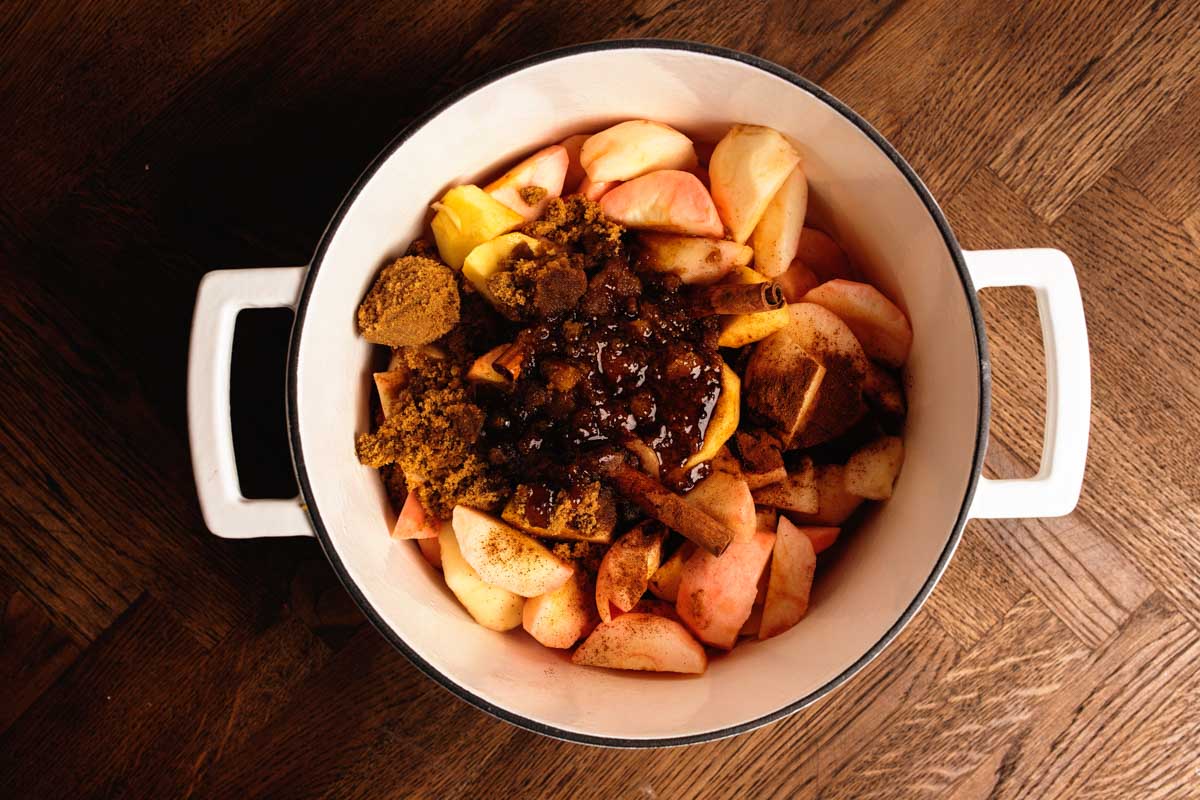
Here comes the easy part, add the apples and all the other ingredients to the Dutch oven. Heat on the stovetop over medium heat and stir. As the mixture comes to a boil, reduce to a simmer and cover the Dutch oven with the accompanying lid. From there allow the mixture to cook for 2 to 3 hours. Give a stir every half hour or so to ensure nothing is sticking or burning to the bottom of the pot. I stirred it twice in two hours and had no issue.
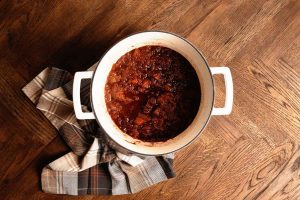
This isn’t an exact science here. We just want the apples to cook down and start to really break down into what looks like chunky applesauce. When ready for the next step, the mixture should be dark brown in color and soft enough to mash remaining chunks while gently using a wooden spoon.


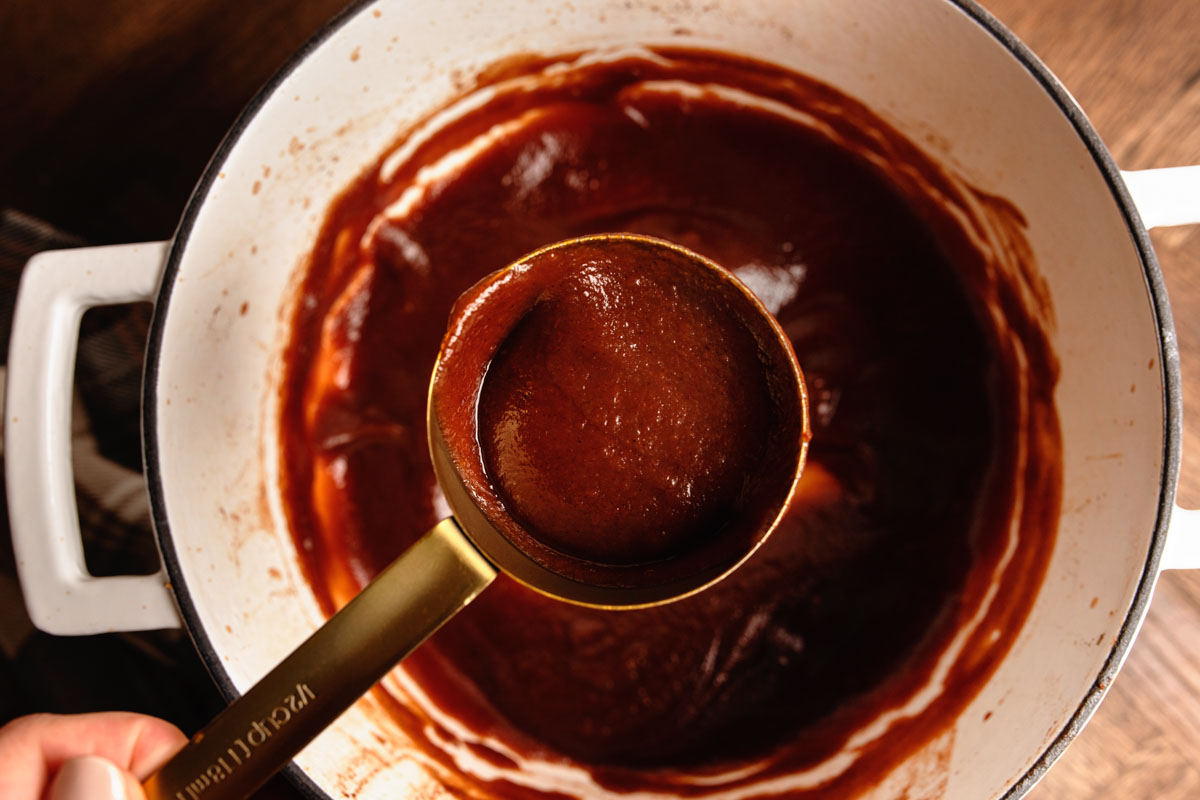
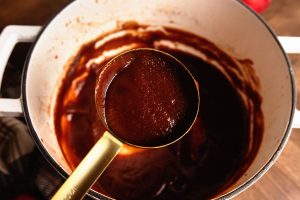
Next, use an immersion blender or tabletop blender to smooth the apple butter into a puree. Return the smoothed mixture to the pot and simmer again uncovered for about 30 minutes. At this step you’ll have to babysit the mixture by stirring, to ensure nothing burns and that you don’t end up with apple butter splattered all over your stovetop.
Once thick, you’re ready to move on to cooling and/or canning.
How do you know if Apple Butter is done?
Let’s talk thickness for a minute. While a deep brown color is one of the tell-tale signs that your apple butter is done, a true test relies on the thickness of the apple butter. And don’t take a shortcut of adding starch to apple butter to get it to thicken. The best thick apple butter is simply a result of time and evaporation. If your apple butter seems to be thick enough when in the chopped stage, but still seems loose after being blended, you’ll want to return it to the Dutch oven and simmer uncovered for 30 minutes to an hour to get the excess liquid to evaporate.
To tell if your apple butter is truly thick enough, pull out a spoonful and turn upside down. The apple butter should cling to the spoon for a bit before falling off. If it falls off immediately, your mixture is still too thin. You can also test on a plate. Place a spoonful onto a plate. If after a few minutes a ring of liquid does not separate and appear around the edge of the spoonful, your apple butter is ready.

Remember that while apple butter does thicken while it cools, it’s more likely that you would end up with too thin of an apple butter versus too thick. When in down, simmer for 30 minutes longer and retest.
Canning Apple Butter
I will not lie when I say that this recipe is a labor of love. Making any apple butter is, especially when you’re a bit impatient as I am. Harvesting apples from our trees meant washing them, peeling, coring, and cutting around any bad spots or wormholes. As I said, these trees haven’t been touched in ages. And while buying apples from your local orchard or the store will not result in as many wormholes, this is still quite the process.
The recipe below yields 4 cups of apple butter once blended. Which is really only going to result in about four quarter pint jars to be canned. At that amount, you are not going to want to share with your neighbors or family come Christmas time. The good news about this recipe is that you can easily double, triple, etc. the ingredients based on how many jars you want and the size of your Dutch oven.

Preserving Stovetop Apple Butter
A typical amount would be to triple this recipe and yield 12 cups of caramel apple butter and thus 12 quarter pint jars. Once blended, simply fill the jars leaving about 1/2 inch of headspace. Cap with warm, clean lids and rings, then water bath as you would any other apple butter or jam. This is typically 10-15 minutes for quarter pints at less than 1,000 feet in altitude. Be sure to adjust based on your personal needs.
Once canned, the apple butter will stay well preserved on a shelf for 12-18 months. Once opened, keep your apple butter in the refrigerator and it will last about 1 month. Now, this is all according to the USDA. I will say from personal experience, we have had apple butter last WAY longer than 18 months. But, use it at your own risk.
How to know if Apple Butter has spoiled
As I said above, use at your own risk after the allotted timeframe. But in general, you’re going to want to check the smell, color, and of course if there is mold then throw it out. I promise you will not forget the rich brown color, sweet smell, and subtle caramel taste of this apple butter. So if any of those are off – throw it out!
More of our favorite
Dutch Oven Recipes Perfect for Canning!
Stovetop Caramel Whiskey Apple Butter
Equipment
- 5-6 Quart Dutch Oven
- Cutting board
- peeler
- Knife
- Kitchen Scale
- measuring spoons
- Wooden Spurtle or Spoon
- Immersion Blender or Countertop Blender
Ingredients
- 3 pounds apples peeled, cored, diced
- 1 cup dark brown sugar
- 1/2 cup water
- 1/2 cup Salted Caramel Whiskey or 1 TB caramel extract
- 1/4 cup honey
- 2 Tablespoons lemon juice
- 1 Tablespoon Apple Pie Spice
- 3 cinnamon sticks
Instructions
- Start by washing your apples in warm water and cleaning with a cloth towel. Once cleaned, peel, core and dice the apples.

- Add the apples and all the other ingredients to the Dutch oven. Heat on the stovetop over medium heat and stir. As the mixture comes to a boil, reduce to a simmer and cover the Dutch oven with the accompanying lid. From there allow the mixture to cook for 2 to 3 hours, stirring every 30-45 minutes until the mixture resembles a soft, chunky applesauce.
- Use an immersion blender or tabletop blender to smooth the apple butter into a puree. Return the smoothed mixture to the pot and simmer again uncovered for about 30 minutes, stirring constantly.
- Serve warm, allow to cool, or continue to processing for canning.
Notes
Nutrition
Did You Make This Recipe?
Share it with me on Instagram @castironrecipesofficial and follow on Youtube @Cast Iron Recipes and Pinterest @castironrecipes for more!


Become A Recipe Insider!
Subscribe to the newsletter for all the latest scratch-made and family-friendly recipes
Leave A Review!
Love this recipe? Make sure to comment below and let me know your thoughts!
This was my first time making apple butter and canning and it turned out GOOD. The recipe was easy to follow along with. I followed he recipe as printed. I used an apple corer to slice/core the apples and being lazy I left the skin on the apples. I was slightly unsure with the texture at the end but committed that it was done and it was fine the next morning. I doubled the recipe and it made 12 small jars, 2 jars with 2 cups, and 1 other medium sized jar. Feedback from the masses was that it was unlike any apple butter they have ever had… in a good way. You could actually taste the apple’s instead of just the apple essence like normal apple butter.
Thank you! Thank you! What an amazing result and response!