
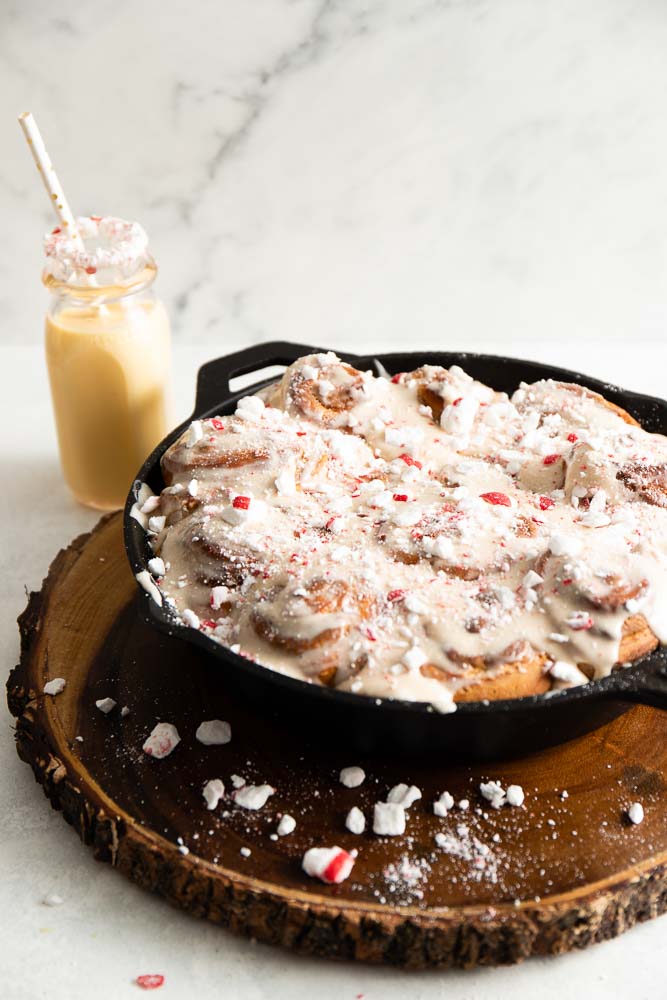
Apple Butter Cinnamon Rolls (Sweet Rolls)
This post may contain affiliate links. We participate in the Amazon Services LLC Associates Program, an affiliate advertising program designed to provide a means for us to earn fees by linking to Amazon.com and affiliated sites at no extra cost to you.
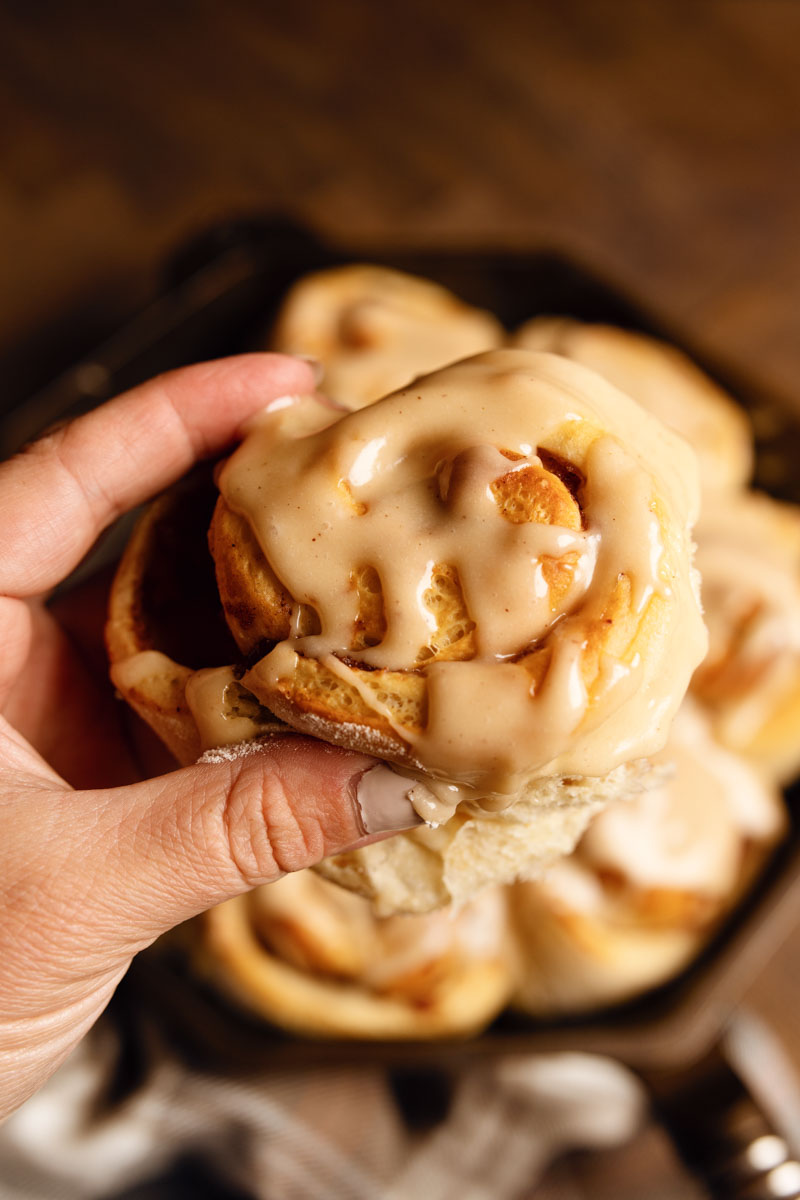
If you’re looking for the fluffiest of Cinnamon Buns, aka Sweet Rolls, then I’ve got you covered in the base of this dough. Add in the apple butter and you’re set with a sweet roll that has the perfect amount of acidity to cut through the fat and sugar. The perfect fall breakfast combination: Apple Butter Cinnamon Rolls
Cinnamon Buns or Sweet Rolls?
Cinnamon Buns, Cinnamon Rolls, Sweet Rolls, Sticky Buns, Sticky Rolls, Cinnamon Swirl, Cinnamon Danish – no matter what you call them, we all have a favorite. I haven’t met a person yet that doesn’t like them. Traditionally served around the holidays, a cinnamon bun or sweet roll is a slightly sweeter, fluffier bread dough that has some sort of filling (usually cinnamon-based) in the center. When cooked, the filling creates an iconic swirl of absolute deliciousness. Drizzled with icing, caramel, or fruit jam and this is a recipe to satisfy all the sweet-tooths in the family.
Looking for more? Try our Starbucks-inspired Peppermint White Mocha Cinnamon Buns!
Tips for Activating Yeast
Heat the liquid to 100-110F. Cooler and the yeast will not activate. Too hot (120F and over) and you’ll kill the yeast.
Warming the liquid can be done on the stovetop with a digital thermometer or in a bowl microwaved for about 45 seconds on high.
You’ll know the yeast is active if after five minutes of time the yeast mixture starts to look foamy.
Add a pinch of sugar or oil to the yeast mixture while activating as this helps to feed the yeast, but do not add any salt during this process as it will slow the activation or stop it altogether.
Dry Active Yeast needs to be activated in warm water. Instant Yeast or Rapid Rise Yeast can be added directly to your recipe without activating first.
A typical 1/4 ounce packet of yeast equals 2 + 1/4 teaspoons.
Yeast needs a warm area to activate, between 70-80F. On cooler days you can activate the yeast in a covered bowl on top of the fridge or on the stovetop with the oven turned on.
Store unopened yeast in a dry, cool place (50F and under) on a shelf or in the freezer for an extended shelflife. Opened yeast should be stored in the refrigerator.
How to Make Cinnamon Rolls with Apple Butter
Making cinnamon rolls can seem daunting. It is a bit time-consuming and when looking at the ingredient list it can feel overwhelming. However, I urge you to move past it. The result of homemade cinnamon rolls is worth all the effort. And just like with anything else, the more you make them, the easier they will become. We’ve even gotten to the point of getting creative, making substitutions, and only double-checking our main recipe.
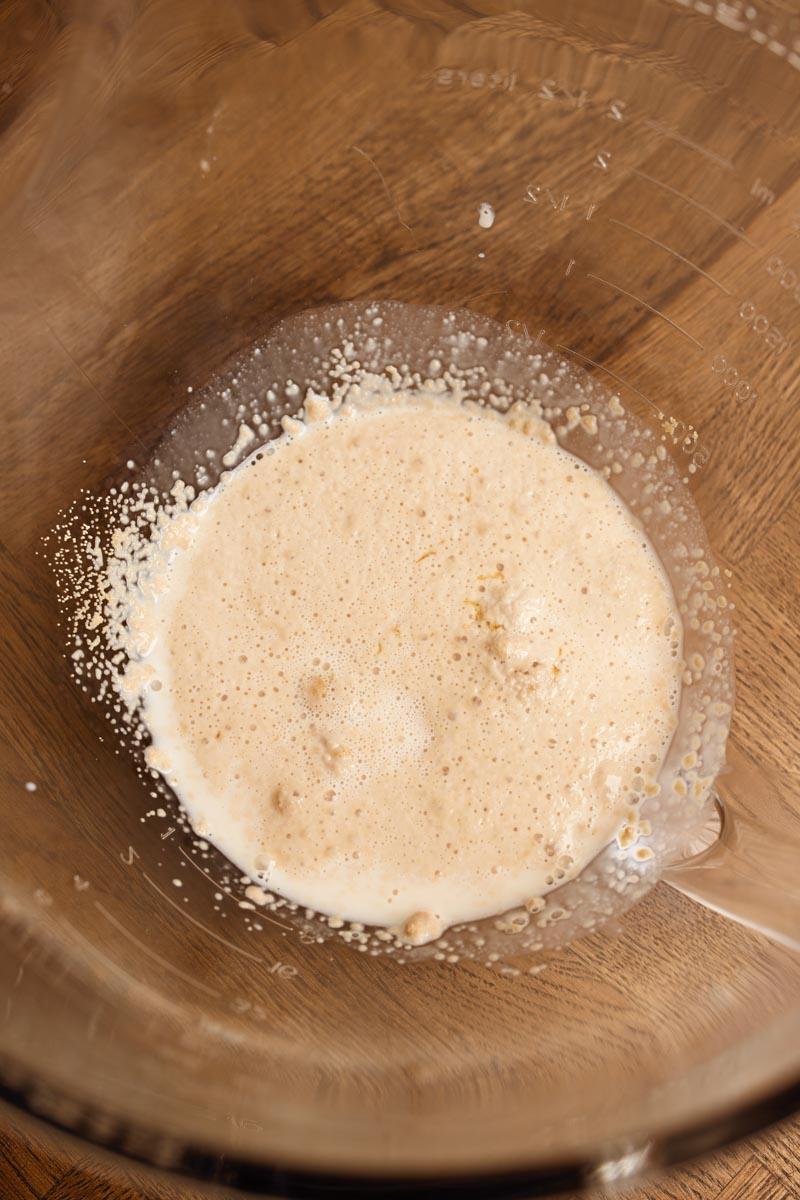
One of the key tips and steps of the cinnamon bun process is activating the yeast. You can do this with water or with milk. We opt for milk for a richer overall result with the dough. But the make-or-break factor here is the temperature of the liquid. To perfectly activate your yeast, the temperature of the milk needs to be between 100F-110F. Any hotter and you will kill the yeast. Any cooler and the yeast will not activate. When your yeast is activated it will foam as shown in the images below. This takes about five minutes.
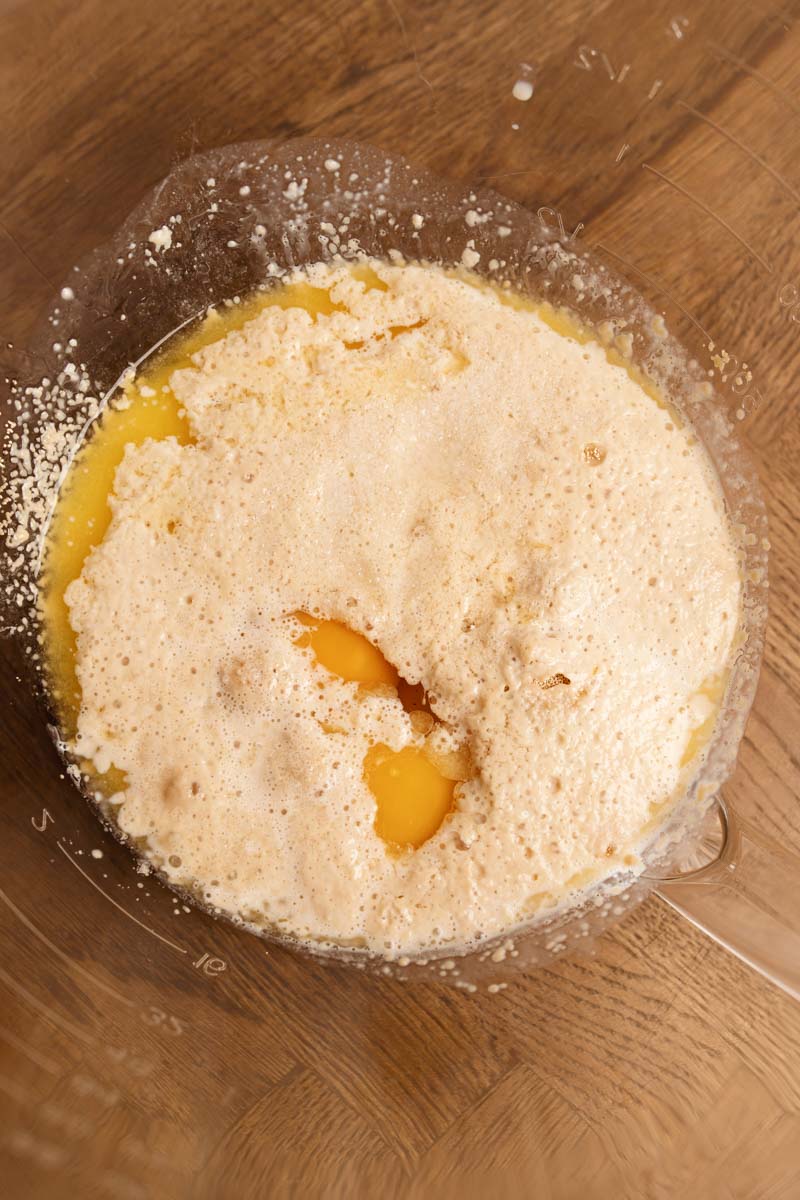
Once the yeast has been activated, add in the melted butter, eggs, and salt. Be careful not to allow the butter to get too hot as it could cook the eggs or kill the yeast. Mix together until well combined. I use a dough hook for the entire process. While I’m sure this is not technically right by chef standards, I’m all about having one less item to wash.

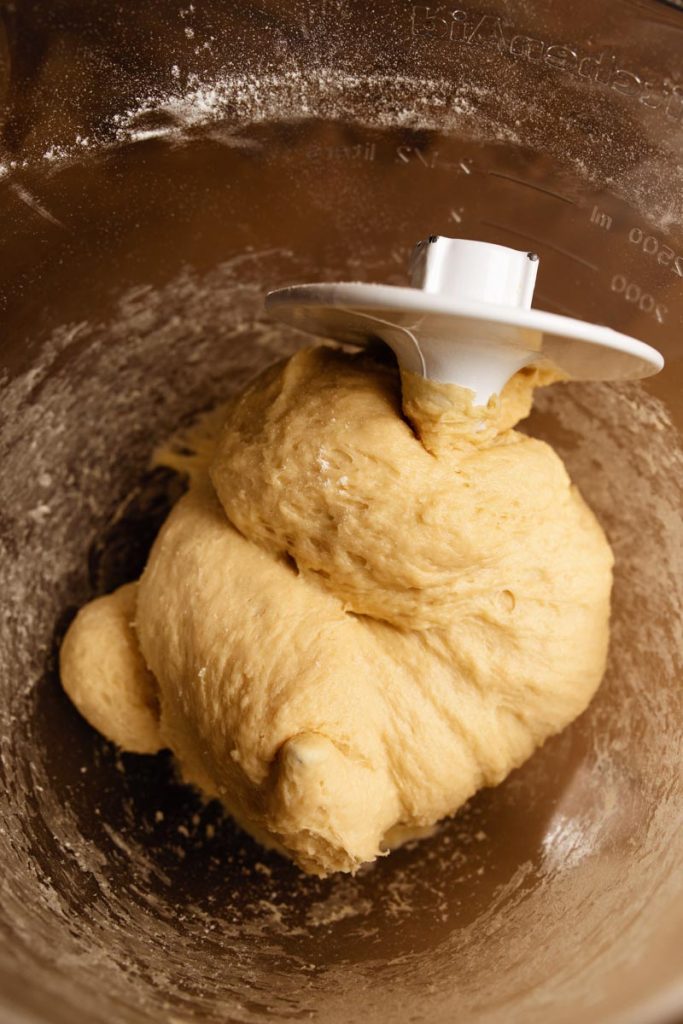
Once the yeast mixture has come together, start adding in the flour one cup at a time while mixing on speed 2 or 4 on the stand mixer. You’ll add about 3 cups of flour total. The dough should easily pull away from the bowl while still being slightly sticky, and likely sticking to the bottom of the bowl. The dough will wrap around itself on the hook in a pretzle-like fashion and start to appear shaggy. Take a look at the images above.
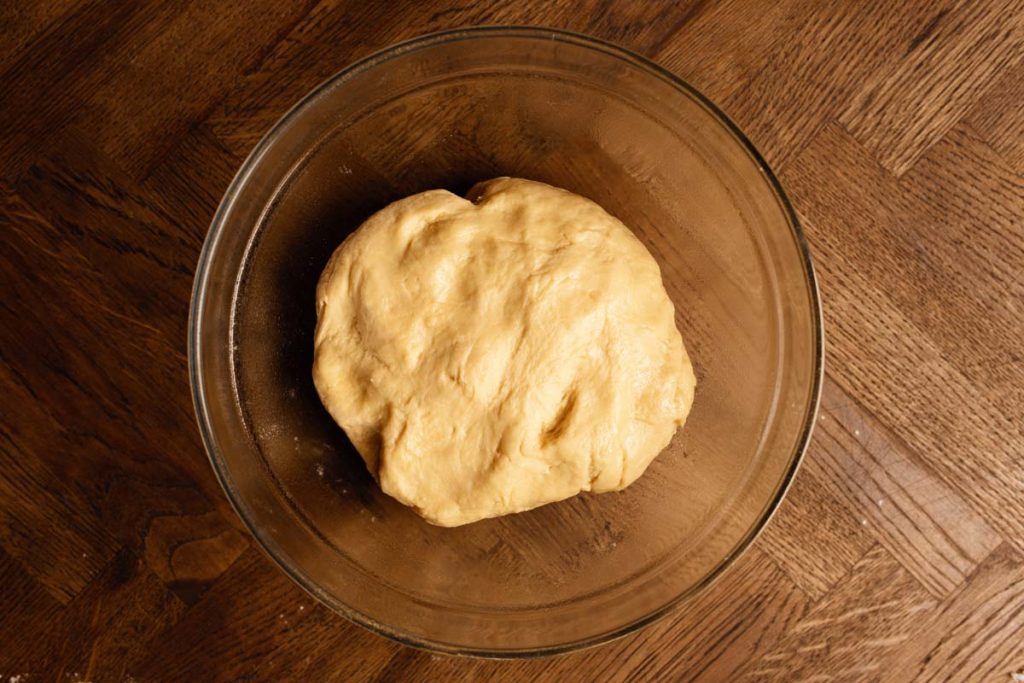
Use oil or PAM cooking spray to coat a clean bowl with a thin layer of oil. Remove the dough from your hook and place it in the bowl. Turn the dough a few times so the outside of the dough is covered lightly with oil. This will help the dough climb the bowl as it rises. Cover the bowl tightly with plastic wrap. Leave the dough covered in a warm spot in the kitchen for about 1 to 1-1/2 hours, until the dough has doubled in size.
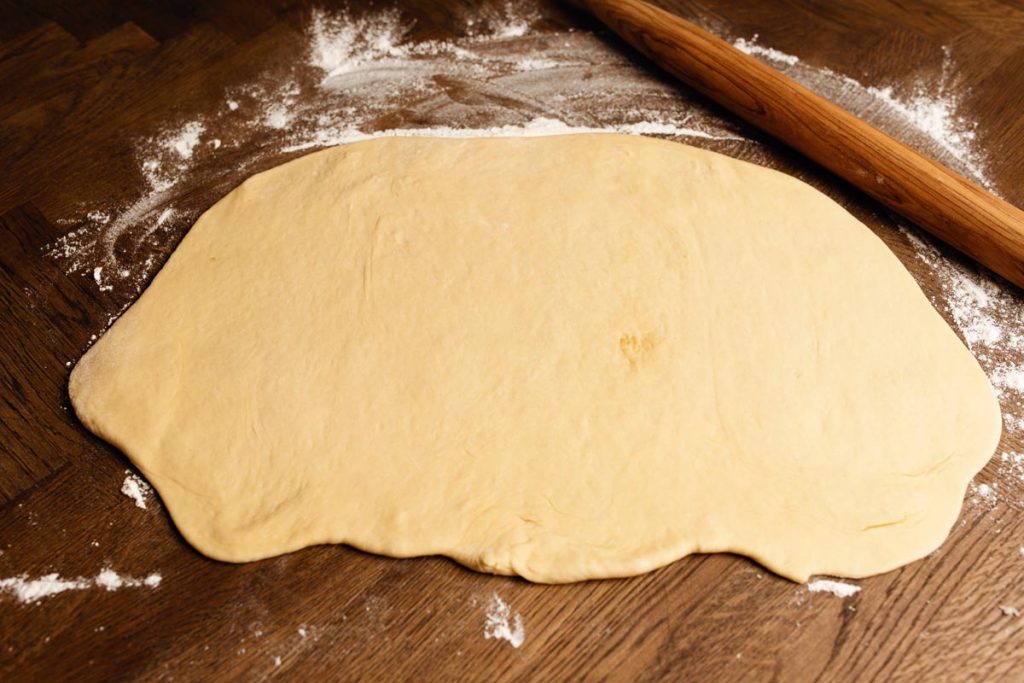
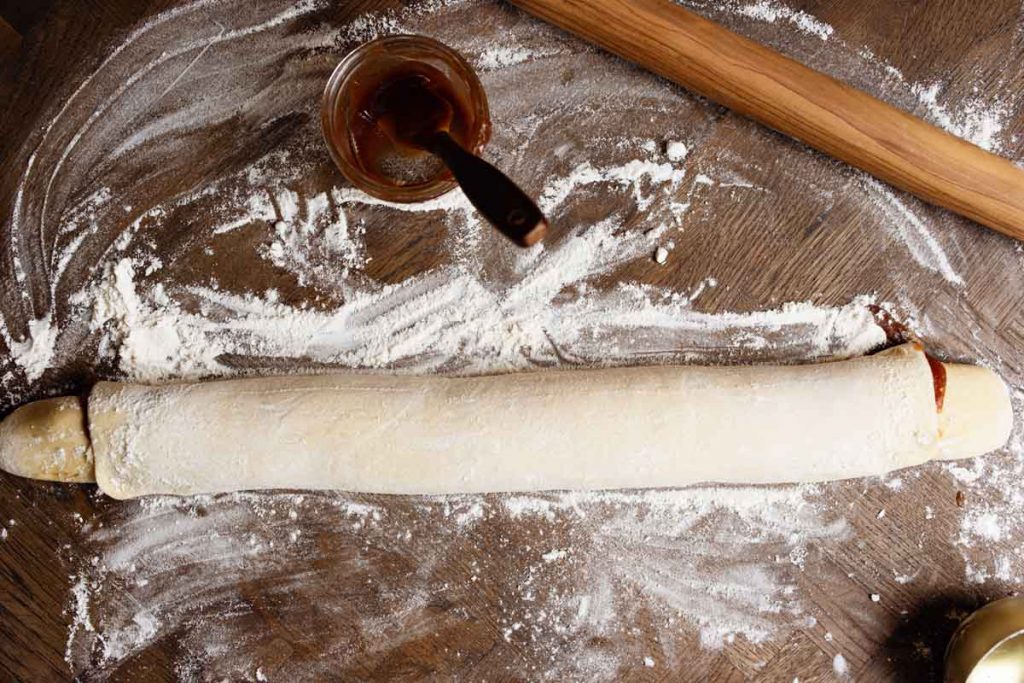
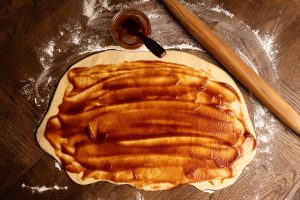
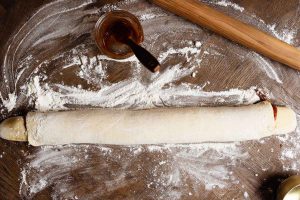
Once the dough has doubled, roll out into a rectangle (approximately 10×15 inches) onto a lightly floured surface. Don’t worry about being perfectly rectangular. You can trim the ends and edges as needed. Pro Tip: Flip the dough every so often while rolling and re-flour so the dough doesn’t stick to the table.
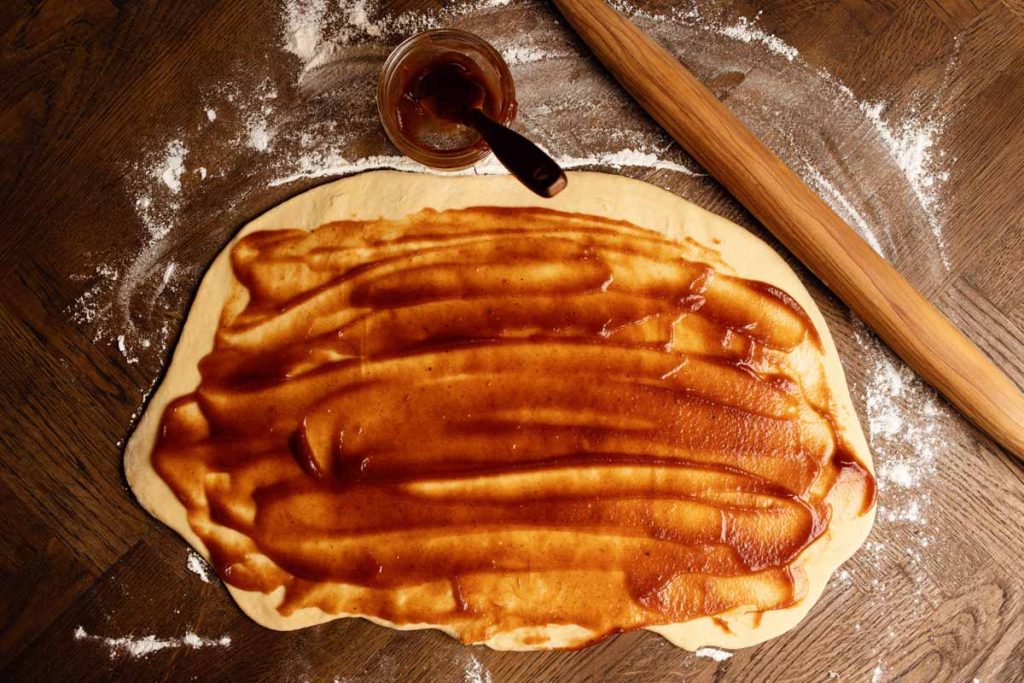
Spread 1 cup of the filling, in this case our Caramel Whiskey Apple Butter, into a thin layer on the dough, leaving about 1 inch bare at the top. Working from the bottom of the dough, roll upward until you reach the end. Then grab the top and pull it towards you to seal the cinnamon roll closed. This tip will help to keep all the apple butter from spilling out as you’re trying to close it.
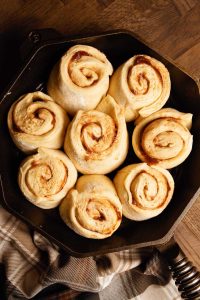
Use a sharp knife to cut the rolls into 8-12 segments. Cutting into 8 will result in larger rolls and a little more control in the filling staying in the roll of the dough. However, if you’re okay with a little bit of a mess, cutting them into 12 will enable you to share with more people.
Place the rolls into a buttered or greased skillet. Cover again with plastic wrap and place in a warm area to double in size and fill the skillet. I typically will cover the skillet and place it on the top of my stove while I preheat the oven. The heat from the oven works like a charm to encourage the dough in a second rise.

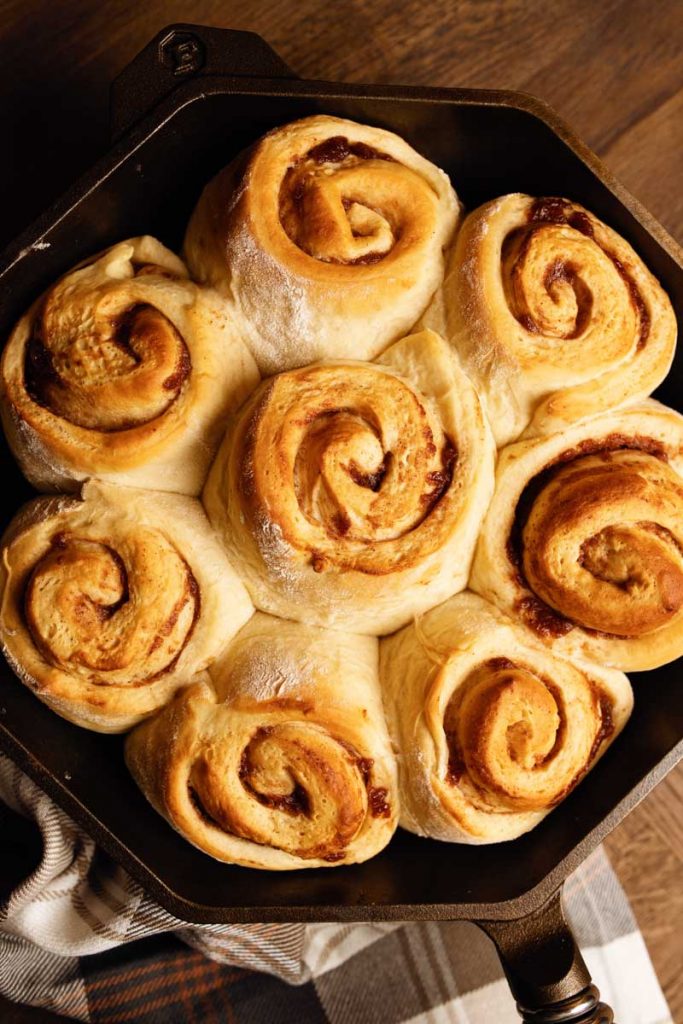
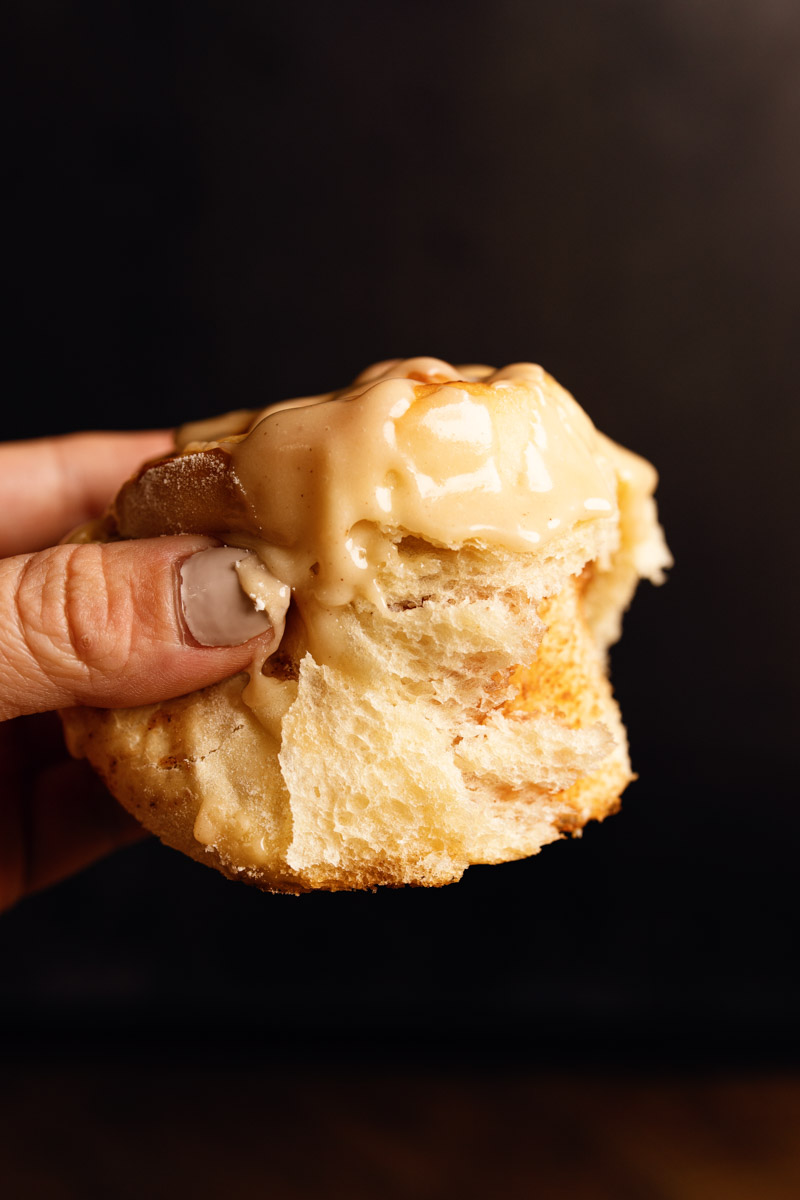
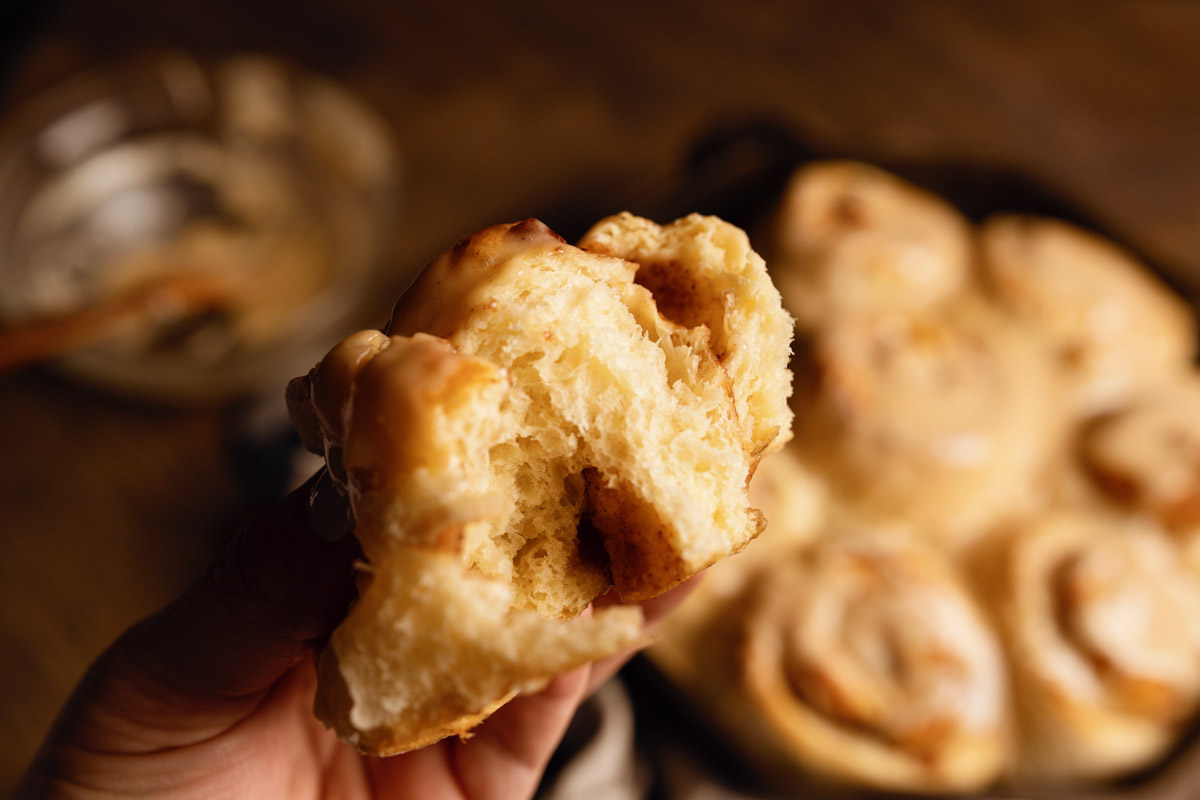
Bake for 25 minutes until slightly golden brown on top. Leave the cinnamon rolls in the skillet to cool slightly while you prepare the icing. Drizzle and serve the best, fluffiest cinnamon rolls you’ve ever had!
Cinnamon Roll Icing
A traditional cinnamon roll icing is really royal icing. Made primarily out of powdered sugar and a liquid such as milk or heavy cream. This is also the perfect place to highlight key flavors. Whether that’s a contrasting flavor such as in a Cranberry Orange Cinnamon Rolls, or to really highlight the main flavor of the filling like we are doing here in the Apple Butter Cinnamon Rolls.
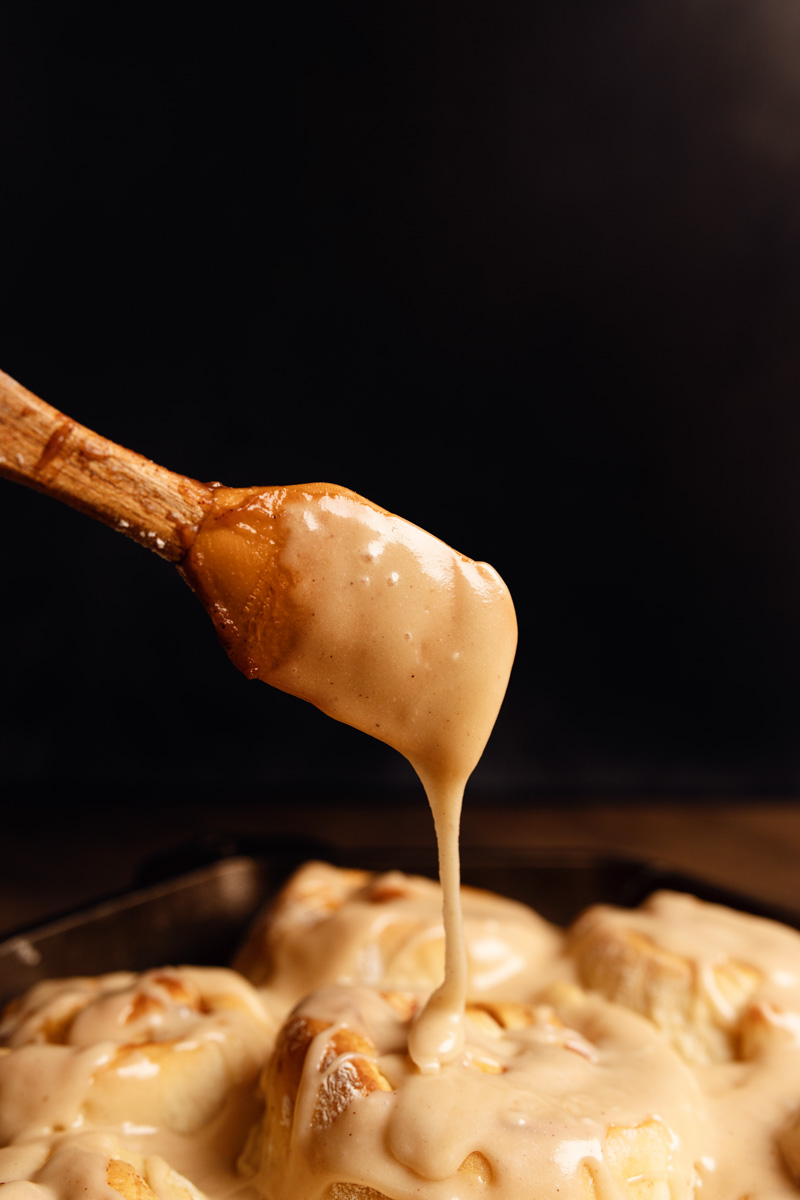
It doesn’t take much. As a general guideline, use 1 cup of powdered sugar, 1 Tablespoon of flavoring, and start with 2 Tablespoons of liquid and whisk until you’ve got your desired consistency.
Note: Feel free to make a big batch of your favorite icing and freeze in a Ziploc bag for future use!
Can you make Cinnamon Rolls Overnight?
Yes! Once you slice the dough and are ready for the second proof, you’ll add the rolls to the skillet. Cover with plastic wrap and place in the refrigerator. In the morning, remove the skillet and place it in a warm area of your kitchen. This will help to bring the skillet back to room temperature without risking thermal shock to the skillet and will initiate the second proof of the cinnamon rolls.
Storing Cinnamon Rolls
Needing to make a big batch of cinnamon buns to save for later? Here are a few options!
To freeze before baking, you’ll want to use a pan or freezer-safe container that is not cast iron. After the rolls have been filled and cut, plan onto the pan, cover, and freeze.
To bake you’ll want to allow the cinnamon rolls to thaw overnight in the refrigerator. Then, transfer to a cast iron skillet and place in a warm spot for the second rise, and continue as normal.
To freeze after baking, allow the cinnamon rolls to cool completely without glazing. Remove from the skillet and wrap tightly in a freezer-safe container as one unit or as individual buns.
To reheat, allow to thaw completely and either place on a plate in the microwave for 30 seconds on high, or in a skillet in a 350F for about 15 minutes. Then glaze and enjoy as normal.
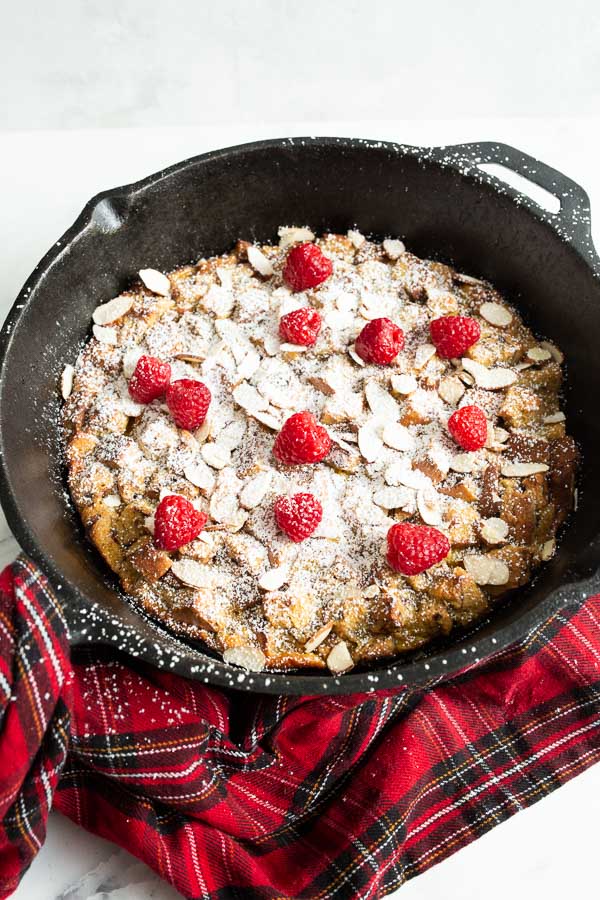
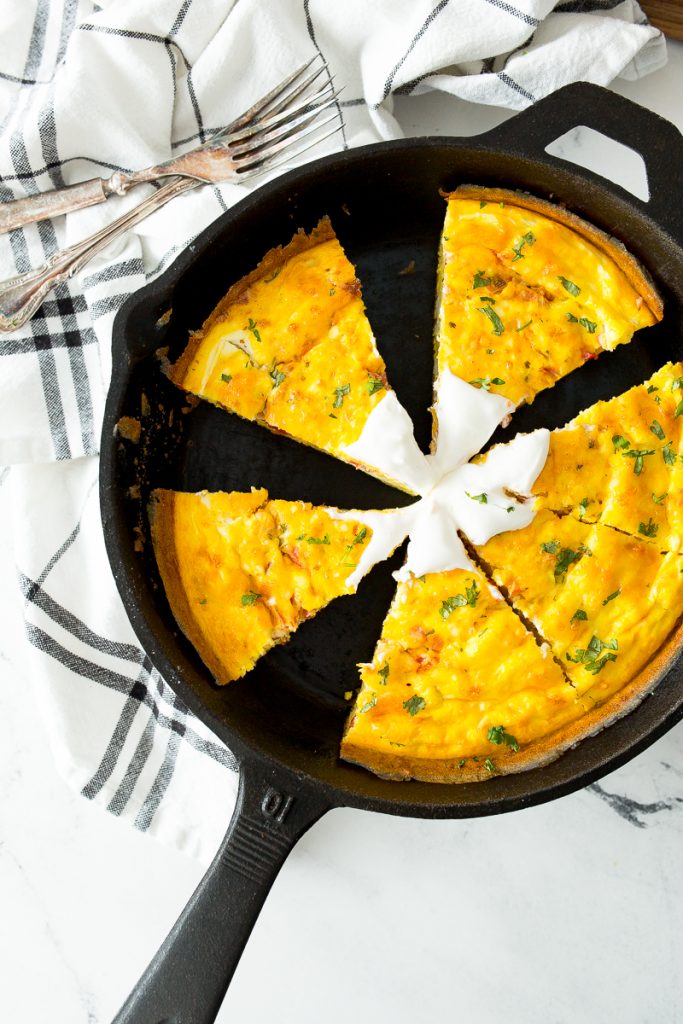
Other Breakfast Foods You’ll Love

Apple Butter Cinnamon Rolls
Equipment
- Kitchen Thermometer
- Kitchen Aid Stand Mixer
- Dough Hook
- measuring spoons and cups
- Bowls
- Whisk
- Knife
- Rolling Pin
Ingredients
- 3/4 cup milk whole
- 2 Tablespoons honey
- .25 ounce dry active yeast 2-1/4 teaspoons
- 4 Tablespoons butter melted
- 1 egg + egg yolk
- 1/2 teaspoon salt
- 3 cups flour all-purpose
- 1 cup apple butter
Apple Butter Icing
- 2 Tablespoons butter
- 1 Tablespoon honey
- 1 cup powdered sugar
- 1 Tablespoon apple butter
- 1 teaspoon vanilla extract
Instructions
For the Dough:
- Warm the milk in a microwave safe bowl for 45 seconds or until milk reaches 100-110F with an instant read thermometer. Pour the warmed milk into the bowl of the stand mixer. Add the yeast and honey. Lightly stir and allow to sit for 5 minutes.

- Add the melted butter, egg plus egg yolk, and salt to the stand mixer. Combine on speed 4 using a dough hook for about 2 minutes.
- One cup at a time add in the flour. Mix until dough pulls away from the edge and wraps like a pretzle around the dough hook, while still remaining tacky enough to cling to the bottom of the bowl. Note: See blog post for in-depth details and tips.
- Transfer dough to a large buttered or greased bowl. Flip the dough around so it is covered with fat on all sides. Cover the bowl tightly with plastic wrap and place in a warm area of the kitchen. Allow the dough to double in size about 1-1/2 hours.
- Roll the dough into a rectangle measuring 10×15 inches on a lightly floured surface. Flip the dough frequently so as not to risk sticking to the table upon rolling.

- Spread the apple butter in a thin layer on the dough, leaving an inch bare at the top. Working from the bottom, roll the dough on itself upwards.
- Cut into 8-12 equal pieces. Place in a greased skillet. Cover with plastic wrap and allow to rise a second time about 30-45 minutes.
- Preheat the oven to 350F and bake for 25 minutes. Tops will be lightly golden. Continue with icing.


For the Icing:
- In a medium bowl, melt together the butter and honey in a microwave using 30 second increments.
- Add the remaining icing ingredients and whisk together until well combined. Drizzle over warm cinnamon rolls and serve.
Notes
Nutrition
Did You Make This Recipe?
Share it with me on Instagram @castironrecipesofficial and follow on Youtube @Cast Iron Recipes and Pinterest @castironrecipes for more!

Become A Recipe Insider!
Subscribe to the newsletter for all the latest scratch-made and family-friendly recipes
Leave A Review!
Love this recipe? Make sure to comment below and let me know your thoughts!
I made these Sunday for breakfast. Recipe was surprisingly easy to follow along with and it turned out perfect the first time around… which is impressive by my standards. I will admit I doubled the amount of filling (2 cups instead of 1) and doubled the amount of icing (…cause you can never have enough of that goodness). I also got 12 rolls that came out the same size. The only thing I found difficult was rolling the roll tight enough…. mine was not tightly wound but when it did the final rise and bake it was fine.
The roll can certainly be tricky especially with the filling. Too tight and it squeezes out. Too loose and it doesn’t stay closed. I’m so glad it worked out for you and your family loved them!